Swagger - Night Club & DJ Elementor Template Kit Activated
Review: Swagger - Night Club & DJ Elementor Template Kit - A Developer's Perspective and Installation Guide
Building a compelling online presence for the dynamic world of nightlife demands not just flair, but also a solid technical foundation. Aesthetics are paramount, certainly, but behind the dazzling lights and pulsating beats, the underlying code and structure must perform flawlessly. This evaluation dives deep into the Swagger - Night Club & DJ Elementor Template Kit, assessing its capabilities from a senior web developer's vantage point and providing a comprehensive guide for its installation and initial configuration. We'll explore whether this kit delivers on its promise of an electrifying design coupled with robust, manageable functionality for clubs, DJs, and event promoters.
First Impressions and Design Philosophy
Upon first interacting with the Swagger kit, the immediate takeaway is its unapologetic embrace of modern nightlife aesthetics. Dark, moody backgrounds juxtaposed with vibrant, neon-inspired accents define the visual language. Typography choices lean towards bold, often sans-serif fonts that command attention, effectively conveying the high-energy, contemporary vibe synonymous with clubs and live music venues. This isn't a subtle kit; it's designed to make a statement, reflecting the very industry it serves. The use of parallax effects, subtle animations on scroll, and a generous allocation of image and video placeholders suggests a kit built for rich media content – a necessity for showcasing DJs, event highlights, and club ambiance.
From a design perspective, the kit employs a full-width layout, maximizing screen real estate to immerse visitors. It successfully avoids clutter, despite the potential for complex content within the nightlife sector. The balance between bold visuals and readable information is generally well-maintained, though some text elements, particularly those on busy background images, might require careful adjustment during customization to ensure optimal accessibility and readability. The overall structure feels intuitive for a visitor seeking event information, artist profiles, or general venue details, indicating a user experience (UX) that prioritizes direct access to core content.
However, as a developer, the critical lens immediately shifts to implementation. While visually striking, the reliance on heavy imagery and animations raises immediate flags regarding performance. Is this visual richness achieved through optimized assets and lean Elementor structure, or does it come with a hidden cost in page load times? This is a fundamental question for any production site, where user patience is a finite resource. We'll explore this aspect further, but the initial impression is certainly one of a visually engaging, purpose-built design.
Core Features and Template Breakdown
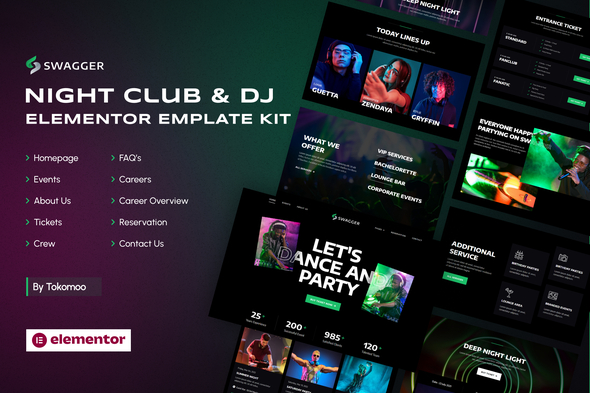
The Swagger Elementor Template Kit is not merely a collection of aesthetically pleasing sections; it's a relatively comprehensive package built to address the specific needs of the nightlife industry. It provides a variety of pre-designed pages and blocks, each tailored for a particular functional aspect:
Home Page
The centerpiece. This template typically features a prominent hero section, often with a full-screen video or captivating image slider, immediately setting the tone. Below this, expect sections dedicated to showcasing upcoming events, highlighted DJs or artists, a gallery preview, and perhaps a call-to-action for ticket purchases or newsletter sign-ups. The structure prioritizes a quick overview, giving visitors a taste of what the venue or artist offers before they dive deeper.
Events Section
Crucial for any club or DJ. The kit provides templates for event listings, often with filters (e.g., "upcoming," "past," "genre"). Each event usually has a dedicated detail page, featuring event descriptions, date and time, venue information, artist lineup, ticket links, and social sharing options. The design here needs to be clear and scannable, making it easy for users to find essential information without unnecessary clicks. Integration with a custom post type for events, or at least a consistent Elementor template structure for single events, is key here for scalability.
Gallery Pages
Visual content is king in this industry. The kit offers templates for photo and video galleries, often employing masonry or grid layouts with lightbox functionality. The design should allow for easy categorization and filtering of media, showcasing the energy of past events. Consideration for responsive image handling and lazy loading is paramount to prevent these media-heavy pages from becoming performance bottlenecks.
DJ/Artist Profiles
For independent DJs or multi-artist venues, dedicated profile pages are essential. These templates typically include a prominent artist photo, bio, social media links, music player integration (e.g., SoundCloud, Spotify embeds), tour dates, and perhaps links to merchandise. The emphasis is on personal branding and providing a comprehensive overview of the artist's work and schedule.
About Us & Contact
Standard but necessary. The 'About Us' pages allow for storytelling – the club's history, mission, or the DJ's journey. The 'Contact Us' pages feature contact forms, location maps (Google Maps integration is common), and direct contact information. These templates are generally clean and functional, focusing on providing essential details without distraction.
Booking/Reservation Forms
While not explicitly a "page," the kit often includes stylized form elements or sections for table reservations, VIP bookings, or general inquiries. These typically integrate with Elementor's native Form widget or a compatible third-party plugin, maintaining the kit's aesthetic.
Blog/News Section
Some kits include templates for a blog or news section, allowing for updates, press releases, or longer-form content. This provides an opportunity for SEO and engagement beyond event listings.
The reliance on Elementor means these templates are built using Elementor sections, columns, and widgets. The kit's effectiveness hinges on how well these elements are structured. Are they using native Elementor widgets efficiently, or are there excessive custom widgets that might lead to vendor lock-in or conflicts? From a preliminary review, it appears to leverage standard Elementor widgets heavily, augmented by clever styling and layout, which is generally a positive as it enhances flexibility and reduces dependency on proprietary components.
Responsiveness across devices is fundamental. The kit appears to be designed with mobile-first principles in mind, adapting layouts for smaller screens, but rigorous testing during implementation is always necessary. Typography, button styles, and color palettes are often managed through Elementor's Global Styles, which is an excellent feature for maintaining consistency and simplifying site-wide changes.
The Elementor Integration: A Developer's Perspective
For any Elementor Template Kit, the quality of its integration with the builder is paramount. Swagger largely adheres to Elementor's best practices, which is a relief. The kit is built predominantly using standard Elementor sections, columns, and widgets. This is a significant advantage: it means less reliance on custom, proprietary widgets that might break with Elementor updates or introduce compatibility issues with other plugins. It translates to greater control for the developer, as modifications can be made using Elementor’s native interface and styling options, rather than wrestling with custom CSS overrides for obscure elements.
Global Styles are leveraged effectively within the kit. This is where primary and secondary colors, typography, and button styles are defined at a site-wide level. After importing the kit, the first step is often to review and adjust these global settings to align with the specific brand identity. This approach ensures consistency across all pages and significantly speeds up design changes. Rather than manually updating fonts or colors on every page, a single tweak in Global Styles propagates throughout the entire site.
The kit also demonstrates a sensible use of Elementor Pro's Theme Builder capabilities. This implies that the header and footer, often complex elements, are constructed as global templates. This is critical for maintainability; a single change to the navigation menu or contact information in the footer updates across all pages. The kit often includes pre-designed header and footer templates, which serve as excellent starting points for customization.
However, no kit is perfect. While Swagger generally avoids excessive nesting of sections and columns, which can lead to bloated HTML and performance issues, there are instances where a developer might choose to refactor certain complex layouts. Deeply nested structures can make selecting the correct element in Elementor's navigator challenging and can contribute to longer rendering times. It's an area where an experienced developer might opt for a slightly flatter structure or employ custom CSS for more precise control, rather than relying solely on Elementor's drag-and-drop capabilities.
Another point of consideration is the kit's responsiveness. While Elementor offers robust responsive controls, the quality of the kit's responsive breakpoints can vary. It's essential to thoroughly test each page on various devices and screen sizes to ensure that text doesn't overlap, images scale correctly, and interactive elements remain functional. Minor adjustments to column widths, font sizes, or element visibility might be necessary for pixel-perfect responsiveness across all viewports.
The kit's content placeholders are also a good indication of its developer-friendliness. They are clear, guiding the user on what type of content to insert, from images and videos to event details and artist bios. This structured approach helps prevent users from haphazardly replacing content, which could inadvertently break the design or lead to inconsistent presentation. Overall, Swagger integrates well with Elementor, offering a solid, customizable foundation that leverages the builder's strengths.
Performance & Optimization Concerns
This is where the rubber meets the road for any modern web project. The nightlife industry demands sites that are not only visually spectacular but also load quickly. Users expect immediacy, especially when looking up event times or ticket information. A slow-loading site, regardless of how attractive it is, directly translates to a poor user experience and potential bounce rates.
The Swagger kit, like many Elementor kits, comes with pre-designed sections that often include high-resolution placeholder images and animations. While these contribute to its aesthetic appeal, they are also the primary culprits for potential performance bottlenecks. Out-of-the-box, it's rare for any template kit to be perfectly optimized for speed without post-installation work.
Here are specific areas where a developer must intervene:
-
Image Optimization: The most significant impact comes from images. Placeholder images, while visually appealing in the demo, are typically not web-optimized. Before going live, every image asset used in the kit (backgrounds, hero images, gallery items, artist photos) must be compressed, resized to appropriate dimensions for their display context, and served in modern formats (e.g., WebP). Tools like TinyPNG, ShortPixel, or Imagify are essential here. Elementor's native image handling is improving, but manual oversight or a dedicated plugin is still superior.
-
Lazy Loading: Ensure that images and videos outside the initial viewport are lazy-loaded. Elementor has built-in lazy loading, but confirming it's active and functioning correctly for all media elements is crucial.
-
CSS & JavaScript Bloat: Elementor itself, and any plugins it relies on (including Pro), can add a fair amount of CSS and JavaScript. While the Swagger kit itself doesn't introduce excessive custom scripts, the sheer volume of Elementor's own assets can be substantial. Implementing a caching plugin (like WP Rocket, LiteSpeed Cache, or Swift Performance) that handles CSS/JS minification, combination, and deferral is highly recommended. These tools can significantly reduce render-blocking resources.
-
Animations & Effects: Parallax effects, subtle hover animations, and background videos, while enhancing the user experience, consume CPU resources and can slow down page rendering. Use them judiciously. If a background video is used, ensure it's self-hosted, highly compressed, and set to autoplay silently, without requiring user interaction.
-
Font Loading: Custom fonts used in the kit can also impact performance. Ensure fonts are properly loaded, ideally self-hosted or preloaded for critical requests, and that only necessary font weights are loaded.
-
Hosting Environment: The best-optimized site can still crawl on subpar hosting. A fast, reliable WordPress host with SSD storage, adequate RAM, and good server-side caching (like LiteSpeed or Nginx FastCGI cache) is non-negotiable for an Elementor-built site, especially one with rich media content.
In its default state, the Swagger kit will likely score moderately on page speed insights tools like Google PageSpeed Insights or GTmetrix. However, with diligent post-installation optimization, scores can be significantly improved, bringing the site into an acceptable performance range for a media-rich Elementor website. Ignoring this step is a recipe for a beautiful but underperforming site.
Installation Guide for the Swagger Elementor Template Kit
Deploying an Elementor Template Kit like Swagger requires a methodical approach. This guide assumes you have a basic understanding of WordPress and file management. We'll cover everything from prerequisites to post-import adjustments.
1. Prerequisites
Before you begin, ensure you have the following:
-
WordPress Installation: A fresh WordPress installation (version 5.9 or higher recommended).
-
Elementor (Free) Plugin: Installed and activated.
-
Elementor Pro Plugin: Crucial. Template Kits, especially those offering global headers, footers, and advanced widgets, heavily rely on Elementor Pro. Ensure it's installed and activated.
-
Theme: A lightweight, Elementor-friendly theme like "Hello Elementor" (recommended by Elementor), Astra, or GeneratePress. These themes provide a clean canvas without interfering with Elementor's styling.
-
Unzip Tool: To extract the downloaded template kit.
2. Downloading and Preparing the Kit
-
Download the Kit: Obtain the "Swagger - Night Club & DJ Elementor Template Kit" from your source (e.g., gplpal). It will typically be a single
.zipfile. -
Extract the Kit: Unzip the downloaded file. Inside, you'll usually find another
.zipfile (this is the actual kit you'll import) and possibly a folder containing individual.jsonfiles for templates and a "Manifest" file. For direct Elementor Kit import, look for the main kit.zipfile.
3. Importing the Template Kit
Elementor Pro offers a streamlined way to import entire template kits:
-
Navigate to Elementor Tools: In your WordPress dashboard, go to Elementor > Tools > Import/Export Kit.
-
Start Import: Click the "Start Import" button.
-
Upload Kit ZIP: Drag and drop or browse to select the kit's main .zip file (not the containing folder you unzipped earlier). Click "Next."
-
Choose Assets to Apply: Elementor will analyze the kit and show you a list of items to import, such as:
-
Templates: Pages, sections, popups, etc. (essential)
-
Site Settings: Global colors, fonts, theme style settings (highly recommended for consistent design)
-
Content: Sometimes demo posts/pages (optional, use with caution if you have existing content)
Select all relevant items. For a fresh installation, selecting everything is usually safe. -
Import: Click "Import." Wait for the process to complete. This can take a few minutes depending on the kit's size and your server speed.
-
Review Results: Elementor will notify you once the import is successful. It might also list any items that couldn't be imported (rare, but can happen due to server limits or conflicts).
Manual Import (if needed, for individual templates)
If the kit import fails, or you only want specific pages/sections, you can manually import individual .json files:
-
Extract all JSONs: Ensure all
.jsonfiles are extracted from the kit's zip. -
Templates > Saved Templates: Go to Elementor > Templates > Saved Templates.
-
Import Templates: Click the "Import Templates" button at the top.
-
Choose File: Select a single
.jsonfile you want to import (e.g., homepage.json, about.json). -
Repeat: Repeat for all desired pages, sections, or theme builder parts.
4. Applying Global Styles and Theme Settings
The imported Elementor Kit will include global site settings. These are foundational for consistency:
-
Access Site Settings: Edit any page with Elementor, then click the "hamburger" icon (top left) and select "Site Settings."
-
Review Global Colors: Check the "Global Colors" section. Adjust primary, secondary, text, and accent colors to match your brand.
-
Review Global Fonts: Under "Global Fonts," modify typography for headings (H1-H6), body text, etc.
-
Review Theme Style: Explore "Theme Style" options for button styles, form fields, images, and other general element styling.
-
Update: Make changes and click "Update" to save your site settings. These changes will propagate throughout your site.
5. Setting Up Your Pages
After importing, the templates are in your library, but not necessarily assigned to live pages.
-
Create New Pages: Go to Pages > Add New in WordPress. Give your page a title (e.g., "Home," "Events," "About").
-
Edit with Elementor: Click "Edit with Elementor."
-
Insert Template: Click the folder icon (Template Library), go to "My Templates," and insert the corresponding template (e.g., the "Home" page template).
-
Configure Page Layout: In Elementor's page settings (bottom left gear icon), ensure the "Page Layout" is set to "Elementor Full Width" or "Elementor Canvas" for full control without theme sidebars/headers.
-
Publish: Save and publish your pages.
-
Set Homepage: Go to Settings > Reading in WordPress, set your newly created "Home" page as your "Homepage Display."
6. Configuring Header and Footer (Elementor Theme Builder)
The kit will likely include global header and footer templates. These need to be activated.
-
Access Theme Builder: Go to Elementor > Theme Builder.
-
Review Templates: Look for "Header" and "Footer" templates. They should be listed here.
-
Set Conditions: If they aren't active, click the "..." on the template and choose "Display Conditions." Set the condition to "Entire Site" for both header and footer. This tells Elementor to display these templates globally.
-
Customize: Edit the header/footer templates with Elementor to update your logo, navigation menu, social media links, and contact information.
-
Menu Setup: For the navigation menu within the header, ensure you've created a menu in WordPress (Appearance > Menus) and assigned it to the Elementor Nav Menu widget in your header template.
7. Customizing Content
This is where you replace the demo content with your own.
-
Edit with Elementor: Open each page you've set up with Elementor.
-
Replace Text: Click on any text element and type in your content.
-
Update Images: Click on image widgets, then click the image to open the media library. Upload your own optimized images. Remember to add descriptive alt text.
-
Embed Videos: For hero sections or galleries, use your YouTube/Vimeo links or upload self-hosted videos (optimized for web).
-
Forms: Configure the contact forms. If using Elementor Forms, set up the email recipients and submission actions.
-
Dynamic Content: For event listings or DJ profiles, you might need to use Elementor Pro's dynamic content features or third-party plugins that integrate with custom post types to manage this content efficiently. The kit provides the design; populating it with real, regularly updated content is a separate step.
8. Post-Installation Optimization (Critical for Performance)
As discussed, performance is crucial. Don't skip these steps:
-
Image Optimization: Use plugins like ShortPixel or Imagify to compress all your uploaded images.
-
Caching: Install a robust caching plugin (e.g., WP Rocket, LiteSpeed Cache, Swift Performance). Configure it to minify CSS/JS, defer scripts, and enable browser caching.
-
Remove Unused Widgets/Plugins: Deactivate and delete any plugins or Elementor widgets you're not actively using.
-
Review & Delete Unused Templates: In Elementor > Templates > Saved Templates, delete any sections or pages you imported but decided not to use.
-
Responsive Checks: Thoroughly test your entire site on desktops, tablets, and mobile phones to ensure all elements display correctly. Adjust column widths, font sizes, and hide elements as needed for specific breakpoints.
9. Troubleshooting Common Issues
-
Import Fails / Blank Page: Often a server resource issue. Increase PHP memory limit (wp-config.php: define('WP_MEMORY_LIMIT', '256M');), or try manual JSON imports.
-
Styling Not Applied Correctly: Clear Elementor cache (Elementor > Tools > Regenerate CSS & Data), clear browser cache, and clear any server/plugin caches. Ensure Elementor Pro is activated.
-
Header/Footer Missing: Check Elementor Theme Builder conditions for your header/footer templates.
-
Images Don't Appear: Verify image paths. If migrating, ensure URLs are updated. Sometimes, an aggressive caching plugin can hide images until caches are cleared.
By following these steps, you can successfully install and configure the Swagger Elementor Template Kit, transforming it from a collection of files into a functional and visually engaging website for your nightlife venture.
Strengths
-
Visually Striking Design: The kit excels in its aesthetic execution, perfectly capturing the high-energy, modern vibe of nightclubs and DJs. It truly looks the part.
-
Comprehensive Page Templates: Offers a good range of pre-designed pages (Home, Events, Galleries, DJ Profiles, Contact) that cover the essential needs of the target niche.
-
Elementor-Friendly Structure: Leverages Elementor's native widgets and Global Styles effectively, minimizing reliance on proprietary custom widgets and promoting easier customization.
-
Time-Saving: For those needing a quick deployment, this kit provides a significant head start, allowing focus on content rather than initial design.
-
Good Starting Point for Responsiveness: While requiring fine-tuning, the templates generally adapt well to various screen sizes, providing a solid foundation for mobile-first design.
Weaknesses & Areas for Improvement
-
Performance Out-of-the-Box: As with many Elementor kits, immediate optimization for speed is necessary. Heavy use of high-resolution imagery and animations can lead to slower load times if not addressed post-installation.
-
Reliance on Elementor Pro: This is inherent to many template kits, but it's a critical point for users. The kit is largely non-functional without Elementor Pro, which adds to the overall cost.
-
Generic Content Placeholders: While necessary, the placeholder content is truly generic. Significant effort is required to populate it with unique, engaging content that truly represents a specific club or DJ.
-
Limited Truly Custom Widgets: While a strength for flexibility, the flip side is that the kit doesn't introduce many unique, niche-specific custom widgets that might further enhance functionality beyond what Elementor Pro offers. This means developers might still need to integrate third-party event plugins or gallery solutions for advanced features.
-
Niche Specificity: While a strength for its target audience, its highly specialized design might make it less adaptable for other industries without significant modifications.
Who Is This Kit For?
The Swagger Elementor Template Kit is an ideal solution for:
-
Nightclub Owners & Managers: Looking for a modern, visually arresting website to showcase their venue, upcoming events, and resident DJs.
-
Professional DJs & Artists: Who need a strong online portfolio, event calendar, and media gallery to promote their brand and bookings.
-
Event Promoters: Requiring a dynamic platform to list and market multiple events across various venues.
-
Small Agencies & Freelance Developers: Building websites for clients in the entertainment and nightlife sectors, seeking a high-quality, customizable foundation to expedite their projects.
It's best suited for those already comfortable with Elementor, or willing to learn its intricacies, and who understand the importance of post-installation optimization for performance.
Final Verdict
The Swagger - Night Club & DJ Elementor Template Kit delivers precisely what its name implies: a bold, energetic, and visually compelling design tailored for the vibrant nightlife industry. Its strength lies in its ability to quickly establish a sophisticated aesthetic without requiring extensive custom coding, largely thanks to its sensible integration with Elementor Pro.
As a senior web developer, I view this kit as a solid boilerplate. It significantly reduces the initial development time for front-end design, allowing more focus on content creation, marketing, and crucial backend optimizations. While it provides a robust structural foundation, it's not a set-it-and-forget-it solution. Expect to invest time in thorough content population, image optimization, and rigorous testing across devices. The kit offers a strong starting point, but a truly performant and unique website will always be the result of careful customization and optimization efforts, leveraging its strong design foundations to create a truly bespoke digital experience.
For more high-quality WordPress resources and Elementor Template Kits, consider exploring the offerings available at gplpal. They also feature a range of Free download WordPress themes, plugins, and kits to kickstart various web projects.
评论 0