HubFix - Gadgets & Electronics Repair Services Elementor Template Kit NULLED
HubFix Elementor Template Kit: A Developer's Unvarnished Review and Installation Guide
For businesses specializing in gadget and electronics repair, establishing a robust online presence is non-negotiable. Many turn to WordPress and Elementor, seeking quick, professional-looking solutions. Among the myriad of available options, the HubFix - Gadgets & Electronics Repair Services Elementor Template Kit presents itself as a dedicated answer for this niche. My aim here is to provide a comprehensive, critical assessment of HubFix from a senior web developer's vantage point, coupled with a practical, step-by-step installation guide. We'll delve into its design efficacy, underlying structure, performance implications, and overall utility for a real-world repair service operation, without mincing words.
Initial Impressions and Design Critique
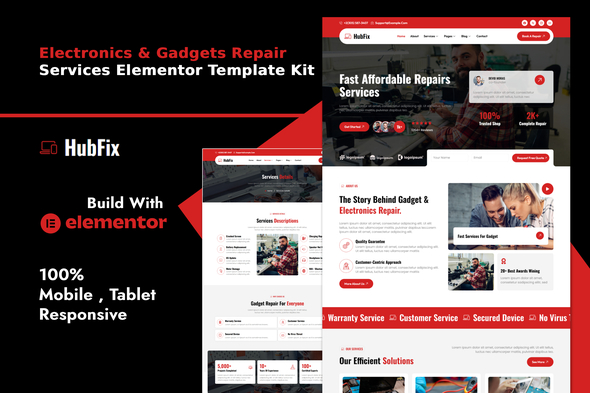
Upon first engaging with HubFix, the kit immediately projects a clean, albeit somewhat generic, professional aesthetic. It opts for a fairly standard corporate blue and grey palette, punctuated by occasional accent colors. This is a safe choice, appealing to a broad audience, but it doesn't particularly stand out. For a repair service, a sense of trustworthiness and efficiency is paramount, and HubFix attempts to convey this through structured layouts and clear calls to action.
Visual Language and Layout Structure
The kit comprises several pre-designed pages: Home, About Us, Services, Service Detail, Pricing, Team, FAQ, Contact Us, and a 404 page. It also includes global header and footer templates, which are essential for site-wide consistency. The homepage follows a predictable but effective hero section → services overview → features/benefits → testimonials → call-to-action → contact form structure. Each section is distinctly separated, relying heavily on large background images and solid color blocks. From a design perspective, this creates a sense of order, but it also risks feeling a bit modular and impersonal without significant customization.
The service pages are well-organized, offering space for detailed descriptions, images, and feature lists pertinent to specific repair types. The pricing tables are functional, presenting service tiers clearly. The team and FAQ pages are standard boilerplate, providing necessary organizational information. While functional, the design doesn't push any boundaries. It's a pragmatic choice for a business owner who needs to get online quickly without a deep understanding of UI/UX trends.
Responsiveness and Mobile Experience
A crucial metric for any modern web asset is its responsiveness. HubFix largely delivers here. Elementor's inherent responsive controls are evidently utilized, with layouts generally adapting well across desktop, tablet, and mobile breakpoints. Text sizes adjust, columns reflow, and images scale appropriately. However, a developer's eye will spot areas where fine-tuning is necessary. Some section paddings or image aspect ratios might require manual adjustment on specific devices to achieve optimal visual balance. It's not a set-it-and-forget-it solution if you demand pixel perfection on every screen size, which, frankly, few template kits truly are.
Typography and Color Palette
HubFix employs a clean, sans-serif typeface, likely Open Sans or a similar Google Font, for most of its textual content. Headings are typically bold and prominent, aiding readability. The choice is safe and effective, ensuring legibility across various screen sizes. The color palette, as mentioned, leans towards corporate blues and greys. This choice conveys professionalism, but it also lacks a unique brand identity out of the box. Businesses will almost certainly need to invest time in customizing these global styles to reflect their specific brand, which is an expected step with any template kit. The global styles feature in Elementor is fully leveraged, simplifying this process significantly.
Technical Deep Dive and Feature Analysis
Beyond the surface aesthetics, a template kit's true value lies in its underlying technical execution and how it integrates with Elementor.
Elementor Integration and Widget Usage
HubFix is built exclusively for Elementor. It leverages Elementor's native widgets extensively, which is a significant plus. Over-reliance on proprietary, custom widgets can lead to vendor lock-in and potential compatibility issues down the line. HubFix sticks to Elementor's core components: text editors, image widgets, icon boxes, call-to-action, progress bars, and forms. This means that if Elementor updates, or if you ever decide to customize beyond the kit, you're working with familiar, well-supported tools. There are no overly complex or resource-heavy custom widgets, which contributes positively to maintainability.
Performance Considerations
Template kits, by their nature, can sometimes be bloated with unnecessary elements or unoptimized assets. HubFix manages to keep things relatively lean. The images used in the demo are of decent resolution but don't appear excessively large, suggesting some level of optimization. That said, any user installing this kit will be responsible for optimizing their own content and images post-import. The kit itself doesn't introduce significant structural overhead beyond what Elementor typically entails. The CSS is generally well-structured within Elementor's framework, and there's no apparent custom JavaScript bloat that would hinder initial page loads. However, server response times, caching, and further image optimization will always be crucial factors in achieving top-tier performance scores, regardless of the template kit chosen.
Code Quality and Structure
When we talk about "code quality" for an Elementor template kit, we're primarily looking at the Elementor structure itself. Are sections nested logically? Are global styles consistently applied? Are classes used effectively? HubFix generally follows good practices. Sections and columns are appropriately used, and the Elementor navigator shows a relatively clean hierarchy. The use of global colors and fonts is consistent, which simplifies site-wide changes. There are no glaring instances of overly complex nesting or unconventional Elementor structural choices that would make customization a nightmare. It’s built competently within Elementor's capabilities.
Customizability and Scalability
This kit is designed for rapid deployment, and its customizability reflects that. Elementor's global styles feature means that changing the primary color, secondary color, and typography is a matter of a few clicks. Individual section content, images, and text are easily editable within the Elementor interface. For a basic repair shop, this level of customization is perfectly adequate. Scaling up, however, might reveal its limitations. If you plan to add complex e-commerce functionality (e.g., selling refurbished parts) or intricate booking systems beyond a simple contact form, you'll be building that on top of HubFix, not within it. The kit provides a solid visual foundation, but it's not an all-encompassing platform solution.
Functionality for Repair Services
HubFix includes specific elements tailored for repair services: clear service listings, a pricing table, a 'why choose us' section, and a contact form. These are essential. The contact form is a basic Elementor form, which can collect inquiries. For advanced booking, integration with a dedicated booking plugin would be necessary. The testimonials section is a standard slider or grid, effectively showcasing social proof. There are no advanced inventory management features or client portal functionalities, but these are typically outside the scope of a simple Elementor template kit. What it promises – a clean, presentable online brochure for a repair service – it largely delivers.
SEO Considerations
From an on-page SEO perspective, the kit provides a solid starting point. Heading tags (H1, H2, H3) are used logically across pages, indicating content hierarchy. Image alt attributes will need to be populated by the user, as the demo images likely have generic descriptions. The structure itself doesn't inherently penalize SEO; rather, it provides a neutral canvas. The responsibility for compelling, keyword-rich content, proper meta descriptions, and subsequent technical SEO optimizations (like sitemap generation, schema markup) falls squarely on the site owner and their chosen SEO tools/plugins. HubFix doesn't hinder or magically boost your SEO; it simply offers a structured framework.
Installation Guide for HubFix Elementor Template Kit
Installing an Elementor Template Kit isn't as straightforward as a full theme, but it offers more granular control. This guide assumes you have a fresh WordPress installation and basic administrative access.
Prerequisites and Preparations
-
WordPress Installation: Ensure you have a working WordPress installation, preferably a clean one to avoid conflicts.
-
Hosting Environment: A reliable hosting provider is essential. Ensure your PHP version is 7.4 or higher, and memory limits are set appropriately (e.g., 256MB or 512MB for WP_MEMORY_LIMIT in wp-config.php).
-
Elementor Plugin: Install and activate the free Elementor plugin from the WordPress Plugin Repository. The HubFix kit is designed for Elementor Free, though Elementor Pro unlocks additional features and widgets that could enhance the site further.
-
Theme: A lightweight, Elementor-compatible theme is recommended. "Hello Elementor" is the official Elementor theme and a perfect choice as it provides a blank canvas, allowing the template kit to dictate the design entirely. Other popular options include Astra, GeneratePress, or OceanWP. Install and activate your chosen theme.
Step 1: Downloading the Template Kit
Once you acquire the HubFix template kit, you'll receive a .zip file. Do NOT unzip this file yet, as WordPress and Elementor expect zipped template kits for direct import.
Step 2: Install the Template Kit Import Plugin
Elementor template kits require a specific plugin to be installed first to facilitate the import process. This is often called "Envato Elements" or a similar "Template Kit Import" plugin, depending on where you sourced the kit. For GPL kits, it's typically the "Template Kit Import" plugin.
-
Navigate to your WordPress dashboard.
-
Go to Plugins → Add New.
-
Search for "Template Kit Import" or "Envato Elements" (if specified by your kit provider).
-
Install and activate the plugin. You should now see a new menu item, often called "Elements" or "Template Kit" in your WordPress dashboard sidebar.
Step 3: Upload and Install the HubFix Kit
-
From your WordPress dashboard, go to Elements (or Template Kit) → Upload Template Kit.
-
Click the "Choose File" button and select the hubfix-gadgets-electronics-repair-services-elementor-template-kit.zip file you downloaded earlier.
-
Click "Install Now".
-
The plugin will process the file. Once uploaded, it might ask you to install any required additional plugins. HubFix typically only requires Elementor, but if it recommends "Elementor Pro" or other specific plugins, install them if you intend to use their features.
-
After successful installation, you'll see a list of templates included in the kit.
Step 4: Importing Global Styles and Site Settings
This is a critical step to ensure your site adopts the kit's global colors, fonts, and theme styles.
-
Within the Template Kit interface (Elements → Installed Kits), find HubFix and click "View Installed Kit".
-
Look for a section or button labeled "Import Global Kit Styles" or similar. This is paramount. Click it.
-
Confirm the import. This will overwrite your theme's default fonts and colors with those from HubFix.
Developer Note: This step ensures consistency. Skipping it will lead to your imported pages looking visually inconsistent with the demo.
Step 5: Importing Individual Templates (Pages and Sections)
Now, you'll import the actual page layouts and section blocks.
-
Go back to the "View Installed Kit" screen.
-
You'll see a list of templates (e.g., Home, About Us, Services, Header, Footer).
-
Start by importing the "Header" and "Footer" templates first. Click the "Import Template" button next to each.
-
Then, proceed to import the main pages: "Home", "About Us", "Services", "Contact Us", etc., one by one.
Developer Note: It's generally best practice to import these templates into new, blank pages you create in WordPress.
Step 6: Creating and Configuring WordPress Pages
Create New Pages:
-
Go to Pages → Add New in WordPress.
-
Give the page a title (e.g., "Home").
-
Click "Edit with Elementor".
-
In the Elementor editor, click the folder icon to open the Template Library.
-
Go to the "My Templates" tab.
-
Insert the corresponding HubFix template you just imported (e.g., select the "Home" template for your "Home" page).
-
Publish or Update the page.
-
Repeat this for all other main pages (About Us, Services, Contact Us, etc.).
Set Homepage:
-
Go to Settings → Reading in your WordPress dashboard.
-
Under "Your homepage displays," select "A static page."
-
Choose the "Home" page you just created from the "Homepage" dropdown.
-
Save Changes.
Assign Header and Footer:
-
If your theme or Elementor Pro has Theme Builder functionality, go to Elementor → Theme Builder.
-
Edit your Header and Footer templates and set their display conditions to "Entire Site."
-
If you're using a free theme like Hello Elementor, the imported header/footer should often integrate automatically, but always verify on the front end.
Step 7: Menu Configuration
-
Go to Appearance → Menus.
-
Create a new menu (or select an existing one).
-
Add your newly created pages (Home, About Us, Services, Contact Us) to the menu.
-
Assign the menu to the "Primary Navigation" location (or whatever your theme designates).
-
Save Menu.
Step 8: Customization and Content Replacement
Global Settings:
-
In Elementor, navigate to Site Settings (the hamburger icon in the top left).
-
Adjust Global Colors and Global Fonts to match your brand identity.
-
Update your Site Identity (Site Title, Favicon).
Edit Page Content:
-
Open each page with Elementor.
-
Click on any text element to edit content.
-
Click on images to replace them with your own (ensure they are optimized for web).
-
Adjust section backgrounds, column layouts, and widget settings as needed.
Forms:
- Edit the contact forms. Configure email recipients, form fields, and submission messages.
Troubleshooting Common Issues
-
Broken Layouts/Missing Styles: This almost always indicates you skipped Step 4 (Importing Global Styles). Go back and do it. Also, ensure your theme is compatible with Elementor and you don't have conflicting plugins.
-
Images Not Loading: Check your media library. If the import failed, you might need to manually upload images. Ensure file permissions on your server are correct.
-
Elementor Errors: Increase your WordPress memory limit in wp-config.php (e.g., define('WP_MEMORY_LIMIT', '512M');). Clear Elementor cache (Elementor → Tools → Regenerate CSS & Data).
-
Form Submission Issues: Verify the email settings in your Elementor Form widget. Use an SMTP plugin (e.g., WP Mail SMTP) for reliable email delivery.
Strengths and Weaknesses: A Final Assessment
Strengths
-
Niche-Specific Design: Directly caters to gadget and electronics repair services, reducing initial design effort.
-
Clean Elementor Integration: Relies on native Elementor widgets, promoting stability and ease of customization.
-
Good Starting Point: Provides a professional, functional base for a business website with minimal fuss.
-
Responsive by Default: Generally adapts well to various screen sizes.
-
Clear Structure: Logical hierarchy of pages and sections.
Weaknesses and Areas for Improvement
-
Generic Aesthetics: While clean, the design lacks a distinctive visual identity out of the box, requiring significant branding effort.
-
Limited Advanced Functionality: As expected with a template kit, it doesn't include complex booking systems, inventory, or client portals. These require additional plugins and integration.
-
Performance Relies on User: While not overtly bloated, achieving top-tier performance metrics requires diligent post-import optimization of images and content by the end-user.
-
Documentation could be clearer: While Elementor kits are often self-explanatory, specific guidance on post-import steps for a novice can sometimes be lacking.
Verdict and Recommendation
The HubFix Elementor Template Kit is a competent, no-frills solution for small to medium-sized gadget and electronics repair businesses. If your primary goal is to establish a professional online presence quickly, showcase your services, and provide contact information without a massive development budget or extensive design customization, HubFix fits the bill. It's an excellent canvas for those familiar with Elementor's interface who are willing to put in the effort to inject their brand's personality and specific content.
For a seasoned developer, it offers a solid starting point that saves time on initial layout and structure, allowing focus to shift to unique features, performance tuning, and specific client requirements. However, don't expect a revolutionary design or built-in complex business logic. It's a foundational layer. As with many GPL products found on platforms like gplapl, it offers a cost-effective route to a professional website. You can explore more options, including various Free download WordPress themes, from such repositories.
In essence, HubFix is a pragmatic choice. It doesn't overpromise, and it largely delivers on its core premise: a functional, presentable website template for the electronics repair industry. Just be prepared to roll up your sleeves for the branding and content population, which is where the real value of your site will ultimately be forged.
评论 0