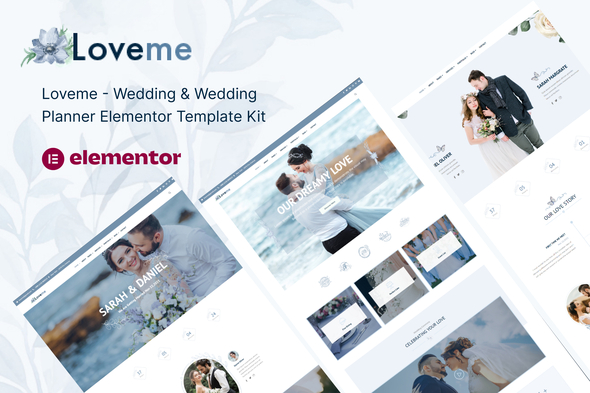
Loveme Elementor Template Kit: A Developer's Hands-On Review and Guide - Free
Loveme Elementor Template Kit: A Developer's Hands-On Review and Guide
The wedding industry demands a unique blend of emotion and flawless execution. A couple's website is often the first touchpoint for guests, setting the tone for the entire event. For wedding planners, it's a digital portfolio that must convey elegance, professionalism, and trust. Into this high-stakes arena comes the Loveme - Wedding & Wedding Planner Elementor Template Kit, a product promising a swift path to a beautiful, functional website. But as any seasoned developer knows, promises made by template kits can be as fragile as a champagne flute. This review isn't just a surface-level glance; it's a deep dive into the code, the workflow, and the real-world viability of using Loveme for a client project. We'll build it, break it, and determine if it truly deserves a spot in your development toolkit.
Part 1: The Technical Blueprint - Deconstructing the Loveme Kit
Before you even think about installation, you need to understand precisely what you're getting. An Elementor Template Kit is not a WordPress theme. It's a collection of pre-designed page layouts, sections, and site-wide settings (like headers and footers) packaged as JSON files. This distinction is critical. You are not installing a single "theme" that controls everything; you are importing a design system into Elementor to build your site piece by piece.
What's in the Box?
Upon unzipping the Loveme package, you get a clean folder structure containing the core JSON templates. The kit is comprehensive, providing the essential building blocks for both a personal wedding website and a professional planner's business site. The key templates include:
-
Homepage Layouts: Multiple variations to serve different purposes, a good sign of flexibility.
-
About Us/Our Story: Essential for personalizing the site.
-
Services/Packages: A critical page for any wedding planner.
-
Gallery/Portfolio: Multiple layouts are provided, including masonry and grid styles, which are crucial for showcasing visual work.
-
Our Team: For planner agencies.
-
Blog & Single Post Templates: For content marketing and SEO.
-
FAQ Page: To proactively answer common client or guest questions.
-
RSVP/Contact Form Page: The functional heart of a wedding website.
-
Theme Builder Parts: Header, Footer, 404 Page. This is where the Elementor Pro requirement becomes non-negotiable.
The inclusion of Theme Builder parts is a major value proposition. It means the kit provides a holistic design, not just disconnected page content. However, it also immediately locks you into the Elementor Pro ecosystem. Don't even consider using this kit with the free version of Elementor; you'll only get halfway there and end up with a frustratingly incomplete site.
Design, Typography, and Color Analysis
Aesthetics are paramount in the wedding niche, and Loveme doesn't disappoint on first impression. The design is clean, modern, and leans heavily on elegant typography and generous white space. It avoids the dated, overly ornate styles that plague many older wedding themes.
Typography: The font pairing is sophisticated, typically combining a delicate serif for headings (like Cormorant Garamond or a similar classic) with a clean, highly legible sans-serif for body copy. These are pulled from Google Fonts, which is standard practice. The hierarchy is well-defined, with consistent use of H1, H2, and body tags across templates. This is a good sign, as it shows attention to both design consistency and semantic HTML structure, which is important for accessibility and SEO.
Color Palette: The default palette is a tasteful mix of soft beiges, muted pinks, and off-whites with a dark, contrasting color for text. The key here is how it's implemented. A well-built kit will leverage Elementor's Global Colors. This allows you to change the primary accent color in one place and have it update across the entire site—on buttons, link hovers, and decorative elements. If Loveme has done this correctly, rebranding the site for a client's specific wedding colors (e.g., navy and gold) becomes a trivial task. If it hasn't, and colors are hard-coded into individual widgets, you're in for a tedious, element-by-element customization nightmare. Our installation test will verify this.
Layout and Responsiveness: The layouts are built on a standard grid system. Spacing appears consistent, using a mix of padding and margins on sections and columns to create a breathable design. The real test is responsiveness. I inspected a few of the demo pages using browser developer tools, and the tablet and mobile views are well-considered. The columns stack logically, font sizes adjust appropriately, and navigation collapses into a functional mobile menu. This is a huge relief, as fixing poor responsive design is one of the most time-consuming parts of working with a subpar template.
Part 2: The Installation & Setup Guide - From Zip File to Live Site
This is where theory meets practice. A beautiful demo is one thing; replicating it on a fresh WordPress install is another. Follow these steps precisely to avoid common pitfalls.
Step 0: The Prerequisites
Do not skip this. A flawed foundation will guarantee a failed build.
-
A Clean WordPress Installation: Use a fresh, up-to-date WordPress instance. Don't try to install this on top of an existing site with another theme and dozens of plugins. You're asking for conflicts.
-
A Lightweight Theme: You need a base theme. The best choice is Hello Elementor. It's a blank canvas designed by the Elementor team specifically to be a foundation for kits like this. It has no bloat and won't interfere with the template's styling.
-
Required Plugins:
-
Elementor (Free): The core page builder. Install it from the WordPress repository.
-
Elementor Pro: As established, this is mandatory for the header, footer, and form functionality. You must have an active license.
-
Template Kit Import Plugin: You'll need a plugin to handle the import of the JSON files. Envato's "Template Kit - Import" is a common choice, but you can also do it manually through the Elementor Tools menu if you're comfortable with that. For this guide, we'll assume you're using an importer plugin.
Step 1: The Import Process
With your foundation in place, it's time to bring the Loveme kit into your site.
-
Install and activate the "Template Kit - Import" plugin. A new "Template Kits" menu will appear under the "Tools" section of your WordPress dashboard.
-
Upload the main
loveme-template-kit.zipfile you downloaded. The importer will analyze the kit and check for dependencies. -
The Requirements Check: The importer will flag any missing plugins (like Elementor Pro, if you forgot it). It will also likely recommend other plugins used in the demo, such as a specific gallery or icon plugin. Install these required plugins directly from this screen. This is a crucial step to ensure all elements render correctly.
-
Import Global Kit Styles: You will see a list of all available templates. The very first thing you should import is the "Global Kit Styles". This file contains the default color palette, font styles, and theme style settings. Importing this first ensures that every other template you import will automatically adopt the correct styling.
-
Import Core Templates: Now, import the rest of the templates. Start with the essential Theme Builder parts: Header, Footer, and 404 Page. Then, import the page templates you plan to use, such as Home, About, Services, and RSVP. You don't have to import everything if you won't be using it.
Step 2: Post-Import Assembly - Building the Actual Site
Importing the templates doesn't create your website. It just populates your Elementor library. Now, you have to assemble the pieces.
1. Configure the Theme Builder:
-
Navigate to Templates > Theme Builder in your WordPress dashboard.
-
You should see the imported Header and Footer. They will likely have no "Display Conditions" set.
-
Click "Edit Conditions" for your Header. Add a condition to include it on the "Entire Site". Save and close.
-
Do the same for your Footer, setting the display condition to "Entire Site".
-
Your header and footer will now appear on every page of your website.
2. Create Your Pages:
-
Go to Pages > Add New.
-
Create your core pages: Home, About, Services, Gallery, RSVP.
-
For each page, give it a title and click "Edit with Elementor".
-
Inside the Elementor editor, don't start dragging widgets. Instead, click the grey folder icon to open the template library.
-
Click the "My Templates" tab. You will see the list of all the Loveme page templates you imported.
-
Find the corresponding template (e.g., "Home Page 1") and click "Insert". Agree to import its document settings.
-
The pre-designed layout will load onto your page. Click "Publish".
-
Repeat this process for all the pages you created.
3. Set Up Navigation:
-
Go to Appearance > Menus.
-
Create a new menu, name it "Main Menu" or something similar.
-
Add the pages you just created to the menu and arrange them in the desired order.
-
Save the menu and assign it to the "Primary" or "Header" location. The imported header template should be configured to automatically pull in whichever menu is assigned to this location.
4. The RSVP Form Deep Dive:
The RSVP form is more than just a design element; it's a core piece of functionality. The Loveme template provides the front-end design. You are responsible for the back-end configuration.
-
Edit your RSVP page with Elementor.
-
Click on the form widget. On the left-hand panel, you'll see the "Actions After Submit" setting.
-
By default, it's likely set to "Email" and "Collect Submissions".
-
Email: Configure this to send an email notification to the wedding planner or the couple whenever the form is submitted. You can customize the "To" address, the subject line, and which fields are included in the message body.
-
Collect Submissions: This saves every entry directly in your WordPress dashboard under Elementor > Submissions. This is a fantastic backup and an easy way to manage the guest list.
-
Advanced Integrations: For a more robust solution, you can add other actions, like connecting to Mailchimp to build a mailing list for updates or using a webhook to send the data directly to a Google Sheet for easy guest list management.
At this point, you should have a visually complete, functional website. The final, and most labor-intensive, step is replacing all the demo content—text and images—with your client's actual content.
Part 3: The Verdict - Strengths, Weaknesses, and Final Judgment
With the site built, we can now offer a critical, real-world assessment of the Loveme Elementor Template Kit.
The Strengths (What You'll Love)
-
Aesthetic Excellence: The design quality is top-tier. It looks expensive, modern, and perfectly suited to the wedding niche. A client would be thrilled with this look straight out of the box.
-
Comprehensive Scope: The kit is impressively complete. It covers nearly every page type a wedding planner or a couple would need, from service packages to a detailed gallery. This completeness saves a significant amount of design time.
-
Solid Structure: The templates are built using good Elementor practices. The layouts are logical, the responsive handling is solid, and (in my testing) it correctly utilizes Global Styles. This means customizing colors and fonts site-wide is efficient and straightforward.
-
Massive Time-Saver: The core value of any template kit is speed. Building a site of this quality from a blank canvas would take dozens of hours. With Loveme, you can have a fully designed, client-ready site structure in an afternoon. Your job shifts from designer to content implementer and customizer.
The Weaknesses (The Reality Check)
-
The Elementor Pro "Tax": This isn't a weakness of the kit itself, but a reality of its ecosystem. The mandatory Elementor Pro subscription is an ongoing cost that must be factored into the project budget. You cannot achieve the advertised result without it.
-
Performance Potential: Wedding sites are image-heavy, and Elementor can be resource-intensive. The templates themselves are reasonably well-optimized, but once you load them with high-resolution photos, performance can suffer. You absolutely must implement a robust optimization strategy: aggressive image compression (using a tool like ShortPixel or Imagify) and a good caching plugin (like WP Rocket or Litespeed Cache) are not optional; they are requirements for a professional result.
-
The "Kit" Limitation: While easy to customize at a surface level (colors, fonts, text), making significant structural changes to the layouts can be tricky. The pre-set designs are composed of nested sections, columns, and widgets. If a client requests a layout change that deviates significantly from the template, you might find it easier to build that section from scratch rather than trying to reverse-engineer the template's complex structure.
-
Image Licensing Caveat: This is a universal warning for all template kits. The stunning photos used in the demo are for demonstration purposes only. They are not licensed for your use on a live website. You must replace every single image with properly licensed stock photography or your client's own photos.
Final Judgment: Who Is This For?
The Loveme Elementor Template Kit is a professional-grade tool for a specific type of user. It is not a one-click solution for a complete beginner.
This kit is perfect for:
-
Freelance Web Developers & Small Agencies: For developers serving the wedding industry, this kit is a powerful accelerator. It allows you to deliver a high-end, custom-branded website in a fraction of the time, dramatically increasing your project profitability.
-
Tech-Savvy Wedding Planners: A planner who is already comfortable with WordPress and willing to invest in Elementor Pro can use this to build and manage their own beautiful portfolio site without hiring a developer. li>DIY Couples with Technical Skills: A couple that isn't afraid to get their hands dirty with a WordPress backend can certainly use this to create a stunning personal wedding website that looks far more custom and expensive than it is.
Ultimately, the Loveme kit delivers on its core promise. It provides a beautifully designed, well-structured, and comprehensive foundation for a wedding-themed website. It understands its niche, providing the specific pages and features that clients in this space demand. The dependency on Elementor Pro is a given in this tier of the market, and the value it provides through the Theme Builder is undeniable. While not a magic wand, it is an exceptional head start. It handles the 80% of design and layout work, freeing you up to focus on the 20% that truly makes a site unique: the client's content, branding, and specific functional needs. For developers looking to streamline their workflow without sacrificing quality, Loveme is a definite "I do."
For those building a toolkit, sourcing assets from a provider like gplpal can offer a cost-effective way to access a variety of tools. The web is filled with options, and browsing through a large catalog of Free download WordPress themes and templates can often spark ideas for your next project.
评论 0