Vidorama Elementor Kit: A Developer's Deep-Dive Review and Installation Guide - Activated
Vidorama Elementor Kit: A Developer's Deep-Dive Review and Installation Guide
The web is saturated with generic corporate templates. For a film or video production company, whose entire business is built on visual storytelling, "generic" is a death sentence. Your website isn't just a digital brochure; it's the opening scene of your brand's story. It needs to be cinematic, immersive, and technically flawless. While a bespoke, custom-coded site is the gold standard, the budget and timeline often make it prohibitive. This is the gap that Elementor Template Kits aim to fill. Today, we are putting one such product under the microscope: the Vidorama - Film & Video Production Service Elementor Template Kit. This isn't a surface-level overview. We're going to tear it down, install it, critique its architecture, and determine if it's a genuine time-saver for professionals or just a pretty facade with a shaky foundation.
Part 1: The First Look – Deconstructing the Kit
Upon unzipping the Vidorama package, you're not presented with a traditional WordPress theme. This is a critical distinction. A template kit is a collection of pre-designed pages, sections, and site-wide settings that work within the Elementor page builder ecosystem. It's a design layer, not a functional theme layer. This means you still need a lightweight, Elementor-friendly theme as a base, like Hello Elementor, Astra, or Kadence.
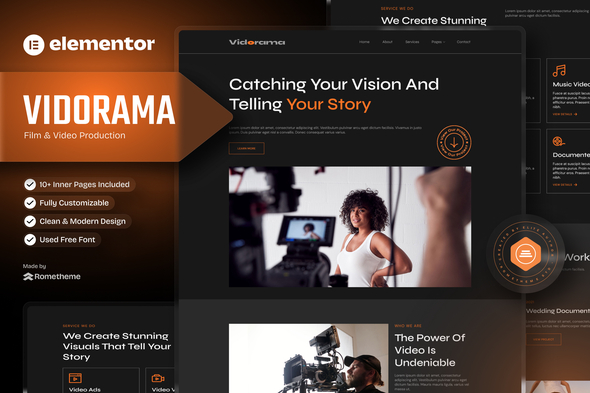
The Vidorama kit includes a comprehensive set of templates designed to cover the essentials for a production service website:
-
Home Page: Multiple variations are often included, showcasing different hero sections (video backgrounds, sliders).
-
About Us: A standard but necessary page for telling your company's story.
-
Services: A layout to detail offerings like pre-production, filming, post-production, etc.
-
Portfolio/Showreel: This is the money page. Its effectiveness is paramount.
-
Team: To showcase key personnel.
-
FAQ: A section to proactively answer common client questions.
-
Contact Us: Includes a contact form and location details.
-
Theme Builder Parts: Header, Footer, Single Post, Single Page, Archive, and 404 Page. These are the global elements that provide a consistent look and feel across the entire site.
The Elephant in the Room: Plugin Dependencies
Let's be direct: this kit is not a "free" solution, and it's fundamentally built around Elementor Pro. The core functionality, especially the Theme Builder parts (Header, Footer, Post layouts), is entirely dependent on the Pro version. The kit also requires a few other free plugins that the import process will typically prompt you to install:
-
Elementor (Free): The core page builder.
-
Elementor Pro: Essential for Theme Builder, premium widgets, and advanced features used in the templates. Sourcing this from a reputable GPL provider like gplpal is a common practice for developers building multiple sites.
-
MetForm or a similar form builder: Used for the contact forms. While MetForm is a common choice, a developer might prefer to swap this out for Gravity Forms or Fluent Forms and remap the form shortcode.
This dependency is not a flaw, but a reality you must factor into your project's budget and technical stack. Trying to use this kit without Elementor Pro will result in a broken, incomplete site. The global header and footer simply won't load, and many of the dynamic content features will fail.
Aesthetic and Design Language
Vidorama leans into a modern, dark-mode aesthetic that is popular within the creative and film industries. It uses bold, condensed typography for headlines and clean, sans-serif fonts for body copy. The color palette is typically muted, with a strong accent color (often a vibrant yellow or orange) to draw attention to calls-to-action. The layouts make heavy use of full-width sections, background videos, and parallax scrolling effects to create a sense of depth and movement. From a design perspective, it hits the right notes for its target niche. It feels professional and high-budget. The real test, however, is how well this design holds up under the weight of real content and how it performs on the front end.
Part 2: The Installation Gauntlet – A Zero-to-Hero Guide
A template kit import can be deceptively simple or incredibly frustrating. Server configurations, plugin conflicts, and incorrect steps can derail the process. Follow this battle-tested procedure to ensure a smooth deployment. We'll assume you have a fresh WordPress installation with a lightweight theme like Hello Elementor already active.
Step 0: The Prerequisite Checklist
-
Staging Environment: Never, ever do this on a live client site. Use a staging subdomain or a local development environment (LocalWP, XAMPP, etc.).
-
Required Plugins: Manually install and activate Elementor and Elementor Pro before you begin. While the importer can do this, I find a manual pre-installation reduces the points of failure.
-
Server Settings Check: A common source of import failure is restrictive server timeouts. Check your php.ini file (or work with your host) to ensure the following values are adequate. I recommend:
-
memory_limit = 256M
-
max_execution_time = 300
-
upload_max_filesize = 64M
Step 1: The Import Tool
Navigate to your WordPress dashboard. Go to Templates > Kit Library. You'll see an "Import Kit" button in the top right. Click it. This will prompt you to install the "Template Kit - Import" plugin if you haven't already. It's a lightweight tool for this specific purpose.
Step 2: Uploading and Initial Import
Once the import interface is active (usually found under Tools > Template Kit), you'll be prompted to upload the Vidorama .zip file you downloaded. The importer will analyze the kit and show you a list of required plugins. This is your chance to install any you missed from the prerequisite step. The importer will handle the installation of free plugins from the WordPress repository.
Step 3: Importing Global Styles and Templates
This is the most critical phase. The importer will present you with a list of all the templates in the kit. You have two main import options:
-
Global Kit Styles: Import this first. This single step populates Elementor's Site Settings with the kit's predefined color palette, typography styles, button designs, and layout settings. Skipping this will result in a chaotic mess of unstyled elements.
-
Individual Templates: You can import everything at once or select specific templates. For a new site, importing everything is standard. The importer will process each template, including the crucial Header, Footer, and Archive layouts. Be patient. If this process times out, it's almost always due to the server settings mentioned in Step 0.
Step 4: The Post-Import Cleanup (The Developer's Job)
This is where many users get lost. The import is not the end of the process. It's the beginning of the configuration.
-
Configure Theme Builder Parts: Navigate to Templates > Theme Builder. You will see the imported Header, Footer, and other parts. They are likely inactive.
-
Click "Edit Conditions" for your Header. Set it to display on the "Entire Site". Save and Close.
-
Repeat the process for the Footer, also setting its display condition to "Entire Site".
-
For the Archive template, set the condition to "All Archives". For the Single Post template, set it to "All Singular > Posts".
Without this step, your site will appear to have no header or footer, using the default theme's instead.
-
Set Your Homepage: Go to Settings > Reading in WordPress. Change "Your homepage displays" to "A static page". From the "Homepage" dropdown, select the imported "Home" page. If you have a blog, you can create a new blank page called "Blog" and assign it as the "Posts page".
-
Build the Navigation Menu: Go to Appearance > Menus. Create a new menu. Add the pages you want in your navigation (Home, About, Services, Contact, etc.). Once created, in the "Menu Settings" at the bottom, assign this menu to the "Header" location (or whatever location the theme provides). The imported Elementor header widget is usually configured to automatically pull in the menu assigned to this location.
After these steps, your site should now look like the demo. You're ready to move from installation to customization and critique.
Part 3: A Developer's Critique – Performance, Code, and Customizability
A pretty demo is one thing; a performant, maintainable website is another. Let's put Vidorama on the operating table.
Responsive Design and Layout Structure
I inspected the key pages in Elementor's responsive mode and with browser developer tools. The good news is that the basic responsive handling is solid. The column stacking on tablet and mobile is logical for the most part. However, I did notice a few common issues that will require manual intervention:
-
Font Size Adjustments: The large, dramatic headline fonts that look great on desktop often feel overwhelming on mobile. You will need to go into the advanced settings for these headline widgets and manually adjust the font size for the mobile breakpoint.
-
Padding and Margins: Spacing that creates a breathable layout on a wide screen can feel cramped or excessive on a narrow one. Expect to tweak the padding values on various sections and columns for a polished mobile experience.
-
Complex Sections: Some of the more visually interesting layouts, using negative margins and absolute positioning to overlap elements, can break on smaller screens. A developer needs to be prepared to create a simplified, mobile-specific version of that section using Elementor's responsive visibility controls (hiding the complex desktop version on mobile and showing a simpler mobile version).
The structure is built on standard Elementor sections, columns, and widgets. It doesn't appear to use outdated or deprecated methods. The nesting depth is reasonable, though in a few hero sections, I found sections nested inside columns which were themselves nested inside another section. While this is sometimes necessary for complex layouts, it adds to DOM bloat and can make editing feel like digging through Russian dolls.
Performance Analysis: The Weight of "Wow"
This is the Achilles' heel of many template kits. Vidorama is visually rich, which comes at a cost.
-
Image and Video Assets: The demo content uses high-resolution images and, critically, background videos. A 10-second MP4 loop for a hero background can easily be 5-10MB. This is a performance killer. Your first job after import is to replace these placeholders with highly optimized assets. Run your images through a tool like TinyPNG and aggressively compress your background videos using a tool like HandBrake. Convert images to the WebP format.
-
DOM Size: Elementor sites are not known for their lean DOM. Vidorama is no exception. A complex page can easily have over 1500 DOM elements. While not a disaster, it's something to be aware of. A good caching plugin (like WP Rocket or FlyingPress) is not optional; it's mandatory. These tools can minify HTML/CSS/JS, delay non-critical JavaScript, and serve cached pages to dramatically speed up load times.
-
Plugin Overhead: Every active plugin adds to the site's load time. With Elementor, Elementor Pro, and a form plugin as the bare minimum, you're already carrying some weight. Be ruthless about adding any more. Does the client "need" that fancy animated text plugin, or can you achieve the effect with a bit of custom CSS?
Out of the box, without caching or optimization, a page built with Vidorama might score in the 40-50 range on Google PageSpeed Insights for mobile. With aggressive asset optimization, a top-tier caching plugin, and a good host, you can push that into the 80s or even 90s. But it requires deliberate work.
Customization and Extensibility
This is where the kit shows its true value. The use of Global Styles is excellent. Changing the primary accent color from the demo's yellow to a client's brand-specific blue is a one-click change in the Elementor Site Settings. This will propagate across all buttons, link hover states, and accent borders. The same goes for typography. This is a massive time-saver.
However, there are limitations. The design is opinionated. If a client wants a fundamentally different layout—say, a grid-based portfolio instead of the cinematic full-width scroller—you're essentially rebuilding that page from scratch. The kit gives you the stylistic building blocks (colors, fonts, button styles), but you'll be doing the architectural work yourself.
For a developer looking to extend the site, the process is straightforward. Let's say you want to add a "Case Studies" custom post type. You would:
-
Register the CPT using a plugin like CPT UI or via your functions.php file.
-
Go to the Theme Builder and create a new "Single Post" template.
-
Design the layout for a single case study using Elementor's dynamic tags to pull in the post title, featured image, and custom fields. You can use the styling from the existing Vidorama templates as a starting point to maintain consistency.
-
Set the display condition for this new template to "Case Studies".
This workflow is efficient and demonstrates that the kit doesn't lock you into a rigid structure. It serves as a strong, consistent design system upon which you can build.
Part 4: The Verdict – Who Should Use Vidorama?
Vidorama is a specialized tool, and its value depends entirely on who is wielding it.
For the Freelance Web Developer/Small Agency:
Verdict: Highly Recommended. This is your sweet spot. The kit can slash your development time for projects in the film/video niche. It allows you to present a visually stunning, near-complete design to a client within days, not weeks. Your job becomes customizing the last 20%—swapping content, optimizing performance, and tweaking mobile layouts—which is where your professional value lies. It's an accelerator, not a replacement for your skills.
For the DIY Production Company Owner:
Verdict: Use with Caution. If you're tech-savvy and willing to learn the intricacies of Elementor Pro's Theme Builder, Vidorama can be a powerful tool. However, if you expect a "one-click and done" solution, you will be disappointed. The post-import configuration requires a methodical approach. If you're not comfortable with concepts like display conditions and menu assignments, the learning curve could be steep and frustrating.
For the Senior Developer or High-End Agency:
Verdict: A Solid Prototyping Tool. You're unlikely to use this kit "as-is" for a high-budget project. Its real value to you is as a rapid wireframing and design asset tool. You can import the kit onto a dev server to establish the visual direction and get client sign-off. From there, you might choose to rebuild key sections for better performance or with custom code. You're using the kit for its design system, not its final output.
Ultimately, the Vidorama kit delivers on its promise: it provides a professional, niche-specific design foundation that can be deployed quickly. Its reliance on Elementor Pro is a given, and its performance requires diligent optimization. It's not a magic bullet, but it's a significant head start. For those looking for other options, browsing through a wide selection of Free download WordPress themes and kits can provide alternatives that might better suit a specific project's aesthetic or technical requirements.
Treat Vidorama as a well-stocked toolbox and a detailed blueprint. The quality of the final structure still depends on the skill of the builder. It's a potent accelerator, but the final lap—optimization, customization, and content integration—is what separates a generic template site from a truly professional web presence.
评论 0