WhizCyber Elementor Kit: A Developer's Deep Dive and No-Nonsense Installation Guide - Activated
WhizCyber Elementor Kit: A Developer's Deep Dive and No-Nonsense Installation Guide
In the world of rapid web development, starting from a blank canvas is a luxury few of us have time for. This is where pre-built assets come into play, but the market is saturated with bloated themes and inflexible page builder templates. Today, we're tearing down the WhizCyber - Cyber Security Elementor Template Kit, a design package aimed squarely at agencies, MSPs, and consultants in the information security sector. This isn't a theme; it's a collection of pre-designed pages, sections, and global styles meant to be imported into an existing Elementor setup. The promise is a high-end, custom look without the weeks of design and development overhead. We'll put that promise to the test, moving beyond the polished demo to see how it holds up in a real-world build, from installation to performance analysis.
What Exactly is an Elementor Template Kit? (And Why You Should Care)
Before we even unzip the files, it's critical to understand the distinction between a template kit and a traditional WordPress theme. Many developers get this wrong and end up frustrated. A WordPress theme controls the entire structure of your site—the header, footer, blog archives, 404 pages, and the fundamental PHP and CSS files that make everything run. It's the foundational architecture.
An Elementor Template Kit, on the other hand, is purely a design layer. It's a collection of JSON files that contain the design data for individual pages, popups, and sections, all built with Elementor. It also includes a master file that dictates the Global Styles: your color palette, typography scales, button designs, and form field styling. Think of it as a meticulously organized project file for a designer, but for your website.
The Strategic Advantages:
-
Theme Agnostic: You aren't locked into a single theme's ecosystem. You can use a lean, lightweight base theme like Hello Elementor, GeneratePress, or Kadence and simply import the WhizCyber design layer on top. This gives you architectural freedom and better performance potential.
-
Modularity: You don't have to use the entire kit. If you only like the "Services" page layout and the footer design, you can import just those specific components. This is impossible with most themes, where you get the whole package or nothing.
-
No Code Bloat (from the kit itself): The kit itself is just data (JSON). It doesn't add cumbersome PHP functions or a dozen JavaScript libraries to your site. The bloat, as we'll discuss later, comes from the plugins the kit requires to function.
The Caveats to Consider:
-
Dependency on Elementor Pro: Let's be clear—to use any template kit effectively, you need Elementor Pro. The free version of Elementor doesn't include the Theme Builder, which is necessary for importing and activating custom headers, footers, and archive templates. The kit is fundamentally designed around these Pro features.
-
More Manual Setup: This is not a one-click "Activate and Go" process. You are the system integrator. You'll need to import the kit, wire up the menus, connect the forms, and replace every single piece of demo content. For a developer, this is standard procedure. For a novice, it can be a significant hurdle.
First Impressions: Unboxing WhizCyber
Upon unzipping the downloaded package, you're presented with a clean directory of files. There's no documentation PDF or extraneous marketing material, just the core assets. This is a good sign—it's focused.
The key files you'll find are:
-
manifest.json: The brain of the operation. This file tells Elementor what's in the kit and what plugins it depends on.
-
kit-settings.json: This contains all the global styling information—the lifeblood of the design system.
-
A series of individual JSON files for each page and template part (e.g., home.json, about-us.json, header.json, footer.json).
A quick look at the manifest.json reveals the required plugins: Elementor, Elementor Pro, and ElementsKit Lite. The dependency on ElementsKit is an immediate point of scrutiny. While a powerful addon, it's also a hefty one. We'll need to evaluate if its usage in the templates justifies the additional performance overhead.
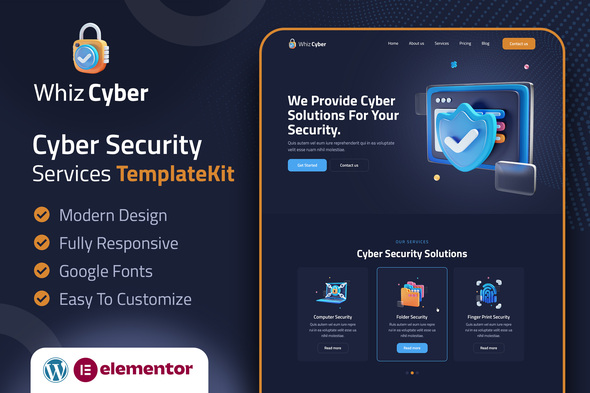
From a design perspective, WhizCyber nails the cyber security aesthetic. It employs a modern, dark-themed palette with electric blue and vibrant green accents. The typography is a clean sans-serif, legible and professional. The use of geometric background patterns, subtle gradients, and icon-heavy feature boxes gives it a high-tech feel without being cliché. The layouts are spacious and follow logical user flow patterns. It looks polished, but the real test is whether that polish is achieved through clean Elementor structures or a tangled mess of negative margins and absolute positioning.
The Installation Gauntlet: A Step-by-Step Technical Guide
This is where theory meets practice. A smooth import process is a hallmark of a well-constructed kit. We'll walk through the process on a clean WordPress installation, highlighting the common pitfalls and necessary post-import cleanup.
Prerequisites: The Foundation
-
A Clean WordPress Install: Do not attempt this on a live site with existing content. Use a staging environment or a fresh local install.
-
A Lightweight Theme: Install and activate the "Hello Elementor" theme. It's a blank canvas designed specifically for this purpose.
-
Core Plugins: Install and activate Elementor (free version) and Elementor Pro. Ensure your Elementor Pro license is active.
Step 1: The Kit Import
Navigate to Elementor > Tools in your WordPress dashboard. Click on the "Import / Export Kit" tab. Click the "Start Import" button. Select the WhizCyber ZIP file you downloaded. Elementor will read the manifest.json file and show you what will be imported: templates, content, and site settings. It will also flag the plugin dependencies. Since we haven't installed ElementsKit Lite yet, it will prompt you to do so. This is a slick part of the import process; you can install and activate the required plugins directly from this interface.
After the plugins are sorted, Elementor will ask which parts of the kit you want to import. For a full site build, you'll select everything. The import process takes about a minute. Once it's done, you'll be greeted with a success screen. But you are not finished. Not even close.
Step 2: The Post-Import Triage (The Developer's Job)
Your site now has all the pieces, but they aren't assembled. This is the most critical phase.
-
Check Your Header and Footer: Go to Templates > Theme Builder. You should see the imported Header and Footer templates. Open each one. You'll likely see they are assigned to "Entire Site". This is good. However, the navigation menu within the header will be broken or showing the wrong items. You need to go to Appearance > Menus, create a new menu (e.g., "Main Menu"), add your newly created pages (Home, About, Services, etc.), and save it. Then, go back into the Header template with Elementor, select the Navigation Menu widget, and assign it to your newly created "Main Menu".
-
Set the Homepage: WordPress still thinks your homepage is the default blog feed. Go to Settings > Reading. Change the "Your homepage displays" option to "A static page". From the dropdown, select the imported "Home" page.
-
Connect the Forms: The contact forms on the "Contact Us" page and potentially in the footer will not work. These are built with ElementsKit's form widget. You need to edit the page, click on the form widget, and configure the "Actions After Submit" settings. At a minimum, you'll want to add an "Email" action and configure it with your email address, a subject line, and so on. You might also want to connect it to a CRM or mailing list service via API if needed.
-
Review Global Styles: Go to any page and edit it with Elementor. Click the hamburger menu in the top-left of the widget panel and go to "Site Settings". Check the Global Colors and Global Fonts. Did they import correctly? The WhizCyber kit does a good job of this, populating the primary, secondary, and accent colors. This is a massive time-saver. Any new button or heading you add will automatically inherit these styles.
-
Replace All Demo Content: This is the grunt work. You must go through every single page, every heading, every paragraph, and every image to replace the placeholder content with your client's actual assets. Pay close attention to images; the demo images are likely not optimized and should be replaced with properly sized, compressed, and named files.
Under the Hood: A Critical Review of WhizCyber's Components
With the site assembled, we can now analyze the build quality of the templates themselves. How did the authors construct these layouts? Is it clean and maintainable, or a house of cards?
Homepage and Core Pages
The homepage is the centerpiece. Opening it in Elementor's Navigator view reveals a well-organized structure. The authors have used Sections for each distinct part of the page (Hero, About Us snippet, Services grid, etc.). Within these, they use Inner Sections to create column layouts. This is standard, best-practice Elementor construction. Responsiveness is handled correctly; the layouts stack neatly on tablet and mobile views without requiring extensive manual adjustments. They've made good use of padding and margins for spacing, avoiding the fragile absolute positioning for core layout elements. However, some of the decorative "blob" shapes and background elements do use absolute positioning, which is an acceptable use case. A developer will need to double-check these on various screen sizes, as they can sometimes overlap content unexpectedly.
Header and Footer (Theme Builder Parts)
The header template is robust. It features the logo, the primary navigation (which we fixed in the post-import step), and a call-to-action button. On mobile, it collapses into a standard hamburger menu. The slide-out menu is clean and functional. The footer is equally well-built, using multiple columns for contact information, quick links, and a newsletter signup form. The use of global styles is evident here; changing the primary button color in Site Settings correctly updates the header's CTA button and the footer's form submission button.
The ElementsKit Dependency
So, why is ElementsKit Lite required? Digging into the pages, it appears to be used for a few key widgets that are not in the standard Elementor Pro set:
-
Advanced Accordion: Used on the FAQ page for a more stylized toggle than Elementor's default.
-
Client Logo Carousel: A scrolling display of logos on the homepage.
-
Contact Form 7 / Metform Integration: The kit appears to use a form widget from this pack.
Could these have been built without this plugin? The accordion, yes, with some custom CSS. The logo carousel would require another dedicated plugin or custom code. The form is replaceable with Elementor's own form widget. The authors likely included ElementsKit for convenience and to achieve a specific stylistic effect easily. For a developer, the trade-off is bloat vs. development time. In this case, the dependency is understandable, but you should be aware that you are adding the weight of an entire UI toolkit for a handful of widgets.
Performance Analysis: Will WhizCyber Bog Down Your Site?
A beautiful design is worthless if the page takes ten seconds to load. Elementor sites have a reputation for being heavy, so a performance analysis is non-negotiable.
After setting up the kit on a basic cloud hosting server (no caching plugins active yet), a GTmetrix scan of the homepage reveals some predictable results. The Largest Contentful Paint (LCP) is around 3.5 seconds, and the fully loaded time is just over 4 seconds. The page size is 2.1MB. These numbers are not great, but they are also not surprising for an unoptimized initial build.
The Primary Culprits:
-
DOM Size: The page has over 1,800 DOM elements. This is high and is a direct result of Elementor's nested
divstructure and the complexity of the design. A large DOM tree strains the browser's rendering engine. -
HTTP Requests: There are 85 requests being made. This is a mix of images, CSS files from Elementor and ElementsKit, and JavaScript files. Each request adds latency.
-
Unoptimized Images: The placeholder images, while not huge, are not served in next-gen formats like WebP and are not perfectly sized for their containers.
-
Plugin Assets: ElementsKit Lite adds its own CSS and JavaScript files, contributing to the overall page weight and request count.
The Optimization Game Plan:
A senior developer sees this not as a failure, but as a starting point. Here's how to bring WhizCyber's performance into the green:
-
Caching: Install a high-quality caching plugin like WP Rocket. This is the single most effective step. It will handle page caching, GZIP compression, and browser caching, immediately reducing load times for repeat visitors.
-
Image Optimization: Use a service like ShortPixel or Imagify to compress all images and convert them to WebP. This will drastically reduce the page size.
-
Asset Management: This is the advanced step. Use a plugin like Perfmatters or Asset CleanUp Pro to selectively disable CSS and JS files on pages where they are not needed. For example, if the ElementsKit accordion script is only used on the FAQ page, disable it from loading on every other page of the site. This requires careful testing but yields significant performance gains.
After implementing these optimizations, it's realistic to expect LCP times to drop below 2 seconds and the fully loaded time to be around 2.5 seconds, which is a perfectly acceptable result for a feature-rich page.
The GPL Question: Value vs. Support
Acquiring WhizCyber from a marketplace like gplpal brings up an important conversation about the General Public License (GPL) and its implications. Products on these platforms are distributed under the GPL, the same license WordPress itself uses. This means you get the full, original software for a significantly reduced price.
The trade-off is direct developer support. When you buy from Envato, a portion of your fee goes towards supporting the original author. You can submit tickets, ask for bug fixes, and get installation help. With a GPL provider, you are on your own. For an experienced developer or agency, this is often a non-issue. We are comfortable debugging CSS, troubleshooting plugin conflicts, and navigating the setup process described above. The value proposition is immense; we get a high-quality design blueprint for a fraction of the cost, and our expertise fills the support gap.
This model is not for everyone. A business owner with no technical experience would be better served by purchasing directly from the author. But for professionals who value the source code and design assets over hand-holding, it's an incredibly efficient way to build. If WhizCyber isn't the right fit, you can find a vast library of alternatives, including many Free download WordPress themes, on their platform, allowing for experimentation without significant financial risk.
The Final Verdict: Is WhizCyber a Worthy Blueprint?
So, what's the bottom line on the WhizCyber Elementor Template Kit? It is a high-quality, professional, and well-executed design package that delivers on its promise of a modern aesthetic for the cyber security industry. Its structure is sound, its use of Elementor's global styles is commendable, and the layouts are both attractive and functional.
It is not, however, a magic bullet. The term "kit" is apt—it provides you with all the raw materials, but you are the one who must assemble, configure, and optimize the final product. The reliance on an additional plugin like ElementsKit is a minor drawback, introducing a layer of bloat that a purist might want to refactor away, but it's an understandable choice for achieving certain design effects quickly.
WhizCyber is ideal for:
-
WordPress developers or agencies building a site for a client in the tech/security space.
-
Marketing teams who are proficient with Elementor and need to quickly spin up a professional-looking microsite or landing page.
-
Anyone who understands the difference between a theme and a template kit and is comfortable with the technical tasks of integration and optimization.
It is a blueprint, not a finished building. But as a blueprint, it is expertly drafted, saving you from hundreds of hours of design, layout, and setup work. It provides the 80% solution, leaving you to apply the final 20% of customization and performance tuning that transforms a good template into a great website.
评论 0