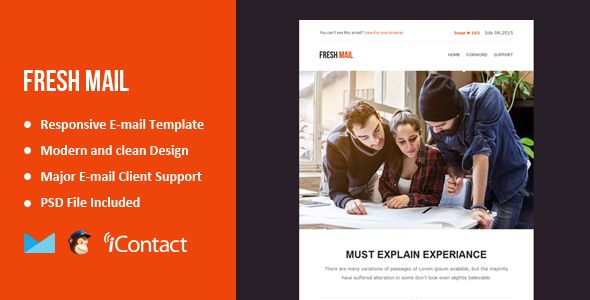
Fresh Mail In-Depth: A Developer's Review of the Themebuilder and Templates - Free
Fresh Mail In-Depth: A Developer's Review of the Themebuilder and Templates
Let’s be direct: building HTML emails is a special kind of hell. It’s a frustrating world of archaic table layouts, inconsistent CSS support, and the ever-present specter of Microsoft Outlook. Every developer has a story about a beautifully crafted campaign that looked perfect in Apple Mail and Gmail, only to completely shatter in a specific Outlook version. It’s why the market is saturated with templates and builders all promising a magic bullet. Today, I’m tearing down one of those offerings: Fresh Mail - Responsive E-mail Template + Themebuilder Access. My goal isn't to just look at the pretty designs. It’s to put it through a real-world stress test. We’ll dissect the code, push the Themebuilder to its limits, and determine if it’s a genuinely useful tool for professionals or just another collection of templates that will break under pressure.
What’s in the Box? Unpacking the Fresh Mail Package
Upon acquiring the package, you’re presented with a well-organized ZIP file. There’s no ambiguity here, which is a good first sign. The root folder contains a few key items:
-
Themebuilder: This isn't software you install. It's a folder containing a single
index.htmlfile that grants access to the online builder. This is the main attraction, and we'll dedicate a significant portion of this review to it. -
HTML: This folder contains the pre-built, ready-to-use templates. They're split into categories like "Business," "E-Commerce," "Marketing," and "Notification." Inside each, you'll find different layouts. There are versions with and without inlined CSS, which is a thoughtful touch for developers who want to work with the styles in a `` block before running it through an inliner themselves.
-
PSD: For designers who live in Photoshop, the inclusion of layered PSD files is a solid value-add. It allows for high-fidelity mockups before ever touching a line of code and makes asset extraction straightforward.
-
Documentation: A basic but functional documentation file guides you through the folder structure and provides initial steps for using the templates and the builder.
The structure is logical. It caters to different workflows: the developer who wants to dive straight into the code, the designer working in Photoshop, and the marketer or hybrid-developer who wants the drag-and-drop experience of the Themebuilder. So far, so good. No red flags.
Code Quality and Compatibility: A Look Under the Hood
A pretty template is worthless if its code is a mess. I grabbed one of the e-commerce templates (ecommerce-2.html) and opened it in my code editor to perform a technical audit. This is where most template packs fail.
The Good: Solid, Defensive Coding Practices
The foundation is exactly what it needs to be: -based layouts. Anyone who tries to sell you on a "modern"-based email template doesn't understand the environment. Email clients are not web browsers, and tables are still the only way to achieve a semblance of consistency.
I immediately noticed the use of Ghost tables and conditional comments for Outlook. For example:
<!--[if mso | IE]><table role="presentation" border="0" cellpadding="0" cellspacing="0"><tr><td>< ![endif]-->
This is a clear indicator that the author knows what they're doing. These conditional comments are used to serve specific table structures only to Microsoft Outlook (MSO) , fixing its notorious issues with padding, widths, and layout rendering. This is non-negotiable for professional email development.
The code is also liberally commented. Sections like "Header," "Two Column Section," and "Footer" are clearly marked out. This modularity is excellent. It means you can confidently copy a block from one template and paste it into another, knowing you're grabbing the entire logical unit. The HTML itself is clean, properly indented, and free of the inline junk that plagues machine-generated code.
Responsiveness is handled via standard media queries targeting a max-width, typically around 600px. Inside the query, classes are used to force tables to width: 100% !important;, stack columns, and adjust padding for mobile viewing. This is a standard, reliable technique that works across the majority of modern email clients (Gmail, Apple Mail, etc.) that actually respect media queries.
The Reality Check: Inevitable Quirks
No template is perfect, and Fresh Mail is no exception. While the code is robust, you still have to contend with the email client landscape.
-
Gmail App (Non-IMAP): Gmail still doesn't support embedded fonts from services like Google Fonts. The template correctly uses a font stack (e.g.,
font-family: 'Lato', 'Helvetica', sans-serif;) which ensures it falls back gracefully to a system font. This isn't a flaw in the template, but a reality you must accept. -
Outlook's DPI Scaling: On high-DPI Windows displays, Outlook can scale emails in a way that creates thin, unwanted lines or slightly fuzzy text. The templates use
mso-line-height-rule: exactly;in many places, which helps mitigate some of this, but it's a beast that can never be fully tamed. -
Background Images: The templates use VML (Vector Markup Language) fallbacks for background images in sections, which is the correct way to get them to show up in Outlook. However, this is always a fragile technique. Complex backgrounds are still a risky bet in email, and you should be prepared for them to not render for a portion of your audience. The template gives you the best possible chance, but it's not a guarantee.
The code is a solid 8.5/10. It’s defensive, well-structured, and clearly built by someone who has been burned by email clients before. It provides a fantastic starting point that handles 95% of the cross-client issues for you.
The Main Event: The Fresh Mail Themebuilder
The pre-built templates are solid, but the real test of value is the Themebuilder. This is a browser-based, drag-and-drop editor designed to let you build custom layouts without writing code. I've used dozens of these, from the builders inside ESPs like Mailchimp to standalone tools like Stripo and BeeFree. The bar is high.
First Impressions and User Interface
Launching the builder presents a clean, three-panel interface. On the left, you have global settings for the email (content area width, background colors, default fonts). In the middle is the live preview of your email. On the right, you have your content blocks: text, image, button, spacer, divider, social, and HTML. It’s an intuitive and familiar layout.
The drag-and-drop functionality is smooth. You can pull a block from the right panel and drop it onto the canvas. Reordering sections is as simple as dragging them up or down. Clicking on any element on the canvas selects it and updates the right panel with its specific properties (padding, colors, content, etc.). The UX is responsive and doesn't feel sluggish.
Building a Campaign from Scratch
I decided to build a simple, common campaign: a header logo, a hero image with a headline, a two-column section with an image and text, a clear call-to-action (CTA) button, and a footer.
Structure: The builder has a "Structure" tab where you can drag in different column layouts (single column, 50/50, 30/70, etc.). This is the right way to do it. You build the skeleton first, then fill it with content.
Content Blocks:
-
Image Block: I dragged an image block into the header. The editor prompts you to upload an image or provide a URL. The uploader is basic but works. Critically, it has a field for Alt Text, which is essential for accessibility and for when images are blocked by the email client. It also has an "Action" section to make the image a hyperlink.
-
Text Block: The text editor is a standard WYSIWYG with options for bold, italic, lists, and links. It also includes a dropdown for merge tags (like
*|FNAME|*), which is crucial for personalization within an ESP. -
Button Block: This is where many builders fail. The Fresh Mail builder creates a "bulletproof" button. Instead of a simple linked image (which won't show if images are off), it uses a heavily styled table cell with a link inside. This ensures the button's shape, color, and text are visible even with images disabled. It offers extensive padding, border-radius, and color controls. This is a huge plus.
The Export: Analyzing the Output
After building my test campaign, I hit the "Export" button. It gives you two choices: download the HTML file or download a ZIP containing the HTML and the images you uploaded. It also has a handy "Send Test" feature to quickly email the result to an address of your choice.
I downloaded the HTML and immediately put it under the microscope. This is the moment of truth. Does the builder generate clean code, or a tag-soup nightmare?
I was pleasantly surprised. The exported code was nearly identical in quality to the pre-built templates. It was clean, table-based, and included all the necessary Outlook conditional comments. The CSS was automatically inlined into the style attributes of the individual elements, which is the final, critical step before sending. Many builders get this wrong, either producing bloated code or failing to inline correctly. The Themebuilder passed this test with flying colors. It generated production-ready code that I would be comfortable sending to a client list.
Practical Guide: From Zero to Sent Email
So, you have the package. How do you actually use it? Here's a developer's workflow.
Step 1: Choose Your Weapon - Template or Builder
First, decide your path. If one of the pre-built layouts is 90% of what you need, start there. It's faster. If you need a completely custom layout, fire up the Themebuilder.
Step 2 (Template Path): Local Edits and Image Hosting
-
Select a Template: Navigate to the
HTMLfolder and pick a layout. Let's usebusiness-1.html. -
Open in a Code Editor: Use something like VS Code, Sublime Text, or Atom.
-
Edit Content: The code is commented. Find the
section and change the headline text. The content is just plain text insidetags. -
Handle Images: This is a critical step many beginners miss. The template's
` tags have placeholdersrcattributes likesrc="images/image-1.jpg"`. This will not work in a real email. You must upload your images to a publicly accessible server. This could be your website's hosting, an Amazon S3 bucket, or your ESP's file manager. -
Update Image Paths: Once uploaded, get the full URL for each image (e.g.,
https://your-cdn.com/email-assets/logo.png) and replace the placeholdersrcattributes in the HTML file.
Step 3 (Themebuilder Path): Build, Customize, and Export
-
Launch the Builder: Open the
Themebuilder/index.htmlfile in your browser. -
Build Your Layout: Drag and drop structures and content blocks to create your email. Use the right-hand panel to customize everything—colors, text, images, links.
-
Export: Once you're happy, click the "Export" button. I recommend downloading the ZIP file, as it conveniently packages your HTML and the images you used. Upload those images to your server as described in Step 2. Then, open the HTML file and ensure the
srcpaths point to your now-live images.
Step 4: Importing to Your Email Service Provider (ESP)
Your HTML file is now ready. Whether it came from a modified template or the Themebuilder, the next step is to get it into your sending platform (Mailchimp, Campaign Monitor, SendGrid, etc.). The process is generally the same across all platforms.
-
Log in to your ESP and start a new email campaign.
-
Proceed until you get to the template/design step.
-
Look for an option named "Import HTML," "Custom Code," "Paste in Code," or similar. Do not choose a pre-made ESP template.
-
Open your final HTML file in a code editor, select all the code (
Ctrl+AorCmd+A), and copy it. -
Paste the entire block of code into the code editor window provided by your ESP.
-
IMPORTANT: Once you paste in your custom code, do not switch back to the ESP's visual/drag-and-drop editor. Many ESPs will try to "re-process" your code to fit their editor's model, which will almost certainly break the delicate structure and re-introduce rendering bugs. Stay in the code view.
Step 5: Test, Test, and Test Again
You are not done yet. Never send a campaign without testing.
-
Use your ESP's "Send a test email" function.
-
Send the test to multiple addresses you control: your Gmail, your work Outlook (if possible), a Yahoo address, and your phone (to check both Apple Mail and the Gmail app on mobile).
-
Click every link to ensure they are correct. Check that your images load.
-
For mission-critical campaigns, use a professional testing service like Litmus or Email on Acid. These services will generate screenshots of your email across dozens of different clients in minutes, revealing any potential rendering issues before your customers see them.
The Verdict: Who Should Buy Fresh Mail?
After a thorough technical shakedown, Fresh Mail holds up. It’s a serious tool, not a toy.
Its Strengths Are Clear:
-
Code Quality: The underlying HTML of both the templates and the builder output is professional-grade. It's clean, commented, and uses established best practices to tackle Outlook.
-
The Themebuilder: The builder is the star. It successfully bridges the gap between raw coding and a user-friendly interface, producing code that a developer would actually write. The bulletproof buttons are a standout feature.
-
Flexibility: The package caters to multiple workflows, whether you're a designer, developer, or marketer. The modularity of the code makes it highly reusable.
Potential Downsides:
-
Not an All-in-One Solution: This is a template and builder toolkit, not an ESP. You are still responsible for image hosting and the technical process of importing and testing in your chosen email platform. It is not a "one-click" system.
-
Learning Curve: While the builder is intuitive, a user with zero knowledge of how email marketing works (e.g., image hosting, merge tags) will still face a learning curve.
This product is ideal for web developers and small agencies that build emails for clients. It provides a rock-solid, time-saving foundation that eliminates 95% of the initial coding grunt work and cross-client debugging. Marketers with a bit of technical savvy who feel constrained by their ESP's native builder will also find the Themebuilder incredibly empowering.
It’s probably not for the complete beginner looking for an experience as seamless as Mailchimp's integrated ecosystem, nor for a large enterprise with an in-house team already managing a bespoke, battle-hardened design system. For everyone in between, it represents a significant value. It’s a tool that respects the complexities of HTML email and delivers on its promise of creating clean, responsive, and compatible campaigns. For professionals looking to add quality assets to their toolkit, resources like gplpal often provide access to such products. While many search for Free download WordPress themes, investing in a specialized tool like Fresh Mail for a core business function like email marketing is a wise decision.
评论 0