Technical Review: The "Click to Dial" WordPress Plugin for Direct Website Calls - Download Free
Technical Review: The "Click to Dial" WordPress Plugin for Direct Website Calls
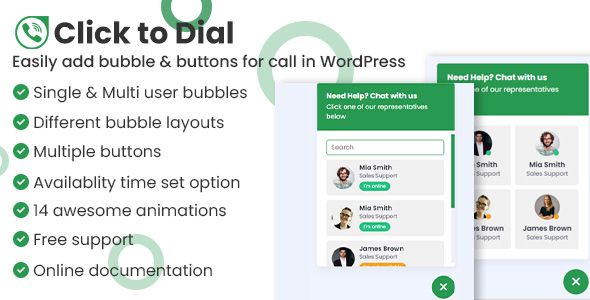
Bridging the digital divide between a user browsing your website and actually picking up the phone to call your business is a persistent challenge. Every extra step, every moment of friction, is a potential lost lead. For service-based businesses, local shops, and sales-driven organizations, a direct line of communication is paramount. This is the exact problem that tools like the Click to dial - Direct call from website WordPress plugin aim to solve. It promises a simple, elegant solution: a persistent, clickable call button on your site. But in a world of complex block editors and all-in-one marketing suites, does a single-function plugin like this still hold its value? I installed it on a test environment to find out, digging into its features, performance, and overall utility for a professional web developer and the clients we serve.
Why Not Just a Simple tel: Link?
Before we dive into the plugin itself, it’s fair to ask the developer's question: "Can't I just code this myself?" The short answer is yes. At its core, a click-to-call function is just a hyperlink with the tel: protocol:
<a href="tel:+15551234567">Call Us Now</a>
When a user on a mobile device taps this link, their phone's native dialer app opens with the number pre-filled. On a desktop, it might trigger a connected application like Skype, FaceTime, or a VOIP client. So, why bother with a plugin?
The reasons boil down to user experience (UX), control, and consistency.
-
Visibility and Accessibility: A simple text link can be buried in a footer or a contact page. A dedicated click-to-call plugin typically provides a floating action button (FAB). This button stays in a fixed position (usually the bottom-right corner) as the user scrolls, making the option to call constantly visible and accessible without forcing them to hunt for it.
-
Device-Specific Logic: Do you really want a prominent "Call Now" button visible to desktop users who may not have a simple way to make a call? A good plugin allows you to conditionally display the button, showing it only on mobile devices or tablets where the action is most natural. This prevents UX clutter for desktop visitors.
-
Styling and Branding: A plugin offers a graphical user interface (GUI) to style the button. You can change colors, icons, and text to match your site's branding without writing a single line of CSS. For non-technical site owners, this is a massive advantage.
-
Advanced Rules and Analytics: Premium click-to-call solutions can integrate with analytics to track how many calls are initiated from the website. Some allow you to set display rules, like showing the button only on specific product pages or hiding it outside of business hours.
A plugin, therefore, isn't just about creating the link; it's about managing its presentation, behavior, and context in a user-friendly and powerful way.
Installation and First Look: A Step-by-Step Guide
Getting the plugin up and running is as straightforward as any standard WordPress plugin installation. Since this is a premium plugin, the process involves uploading a zip file rather than searching the official repository.
Step 1: Download the Plugin
First, you need to acquire the plugin file. After purchasing, you'll download a .zip archive to your local machine. Keep this file handy.
Step 2: Upload to WordPress
Log in to your WordPress dashboard. Navigate to the plugin section:
-
From the left-hand menu, go to Plugins > Add New.
-
At the top of the screen, click the Upload Plugin button.
-
Click Choose File and select the
.zipfile you downloaded in the previous step. -
Click Install Now.
WordPress will handle the rest, unpacking the archive and placing the files in your wp-content/plugins directory. This process took only a few seconds on a standard shared hosting environment.
Step 3: Activate the Plugin
Once the installation is complete, you'll see a success message. The final step is to click the Activate Plugin button. Upon activation, a new menu item, typically labeled "Click to Dial" or something similar, will appear in your main WordPress admin sidebar. This is where all the configuration happens.
My first impression of the admin panel was one of simplicity. It wasn't cluttered with unnecessary advertisements or complex tabs. The options were laid out logically, which is a good sign. It suggests the developer prioritized function over fluff.
Deep Dive: Configuring the Call Button
This is where the plugin needs to justify its existence. The configuration panel is the heart of the tool, and its flexibility determines the plugin's ultimate value. I've broken down the key settings I found and tested.
Button Settings: The Core Functionality
The most crucial section is where you input your phone number and enable the button.
-
Phone Number: A simple text field. It's important to enter the number with the international country code (e.g.,
+1for the US,+44for the UK). This ensures it works for international visitors and avoids ambiguity. The plugin did not have any validation here, so a typo could easily break the functionality. A small improvement would be to add a simple format checker. -
Enable Floating Button: A toggle switch that turns the site-wide floating button on or off. This is the main feature, and it was responsive immediately upon saving the settings.
-
Call Button Text: An optional field to add text next to the icon (e.g., "Call Us"). Leaving it blank typically results in just an icon, which is a cleaner look for mobile screens.
Styling and Appearance: Matching Your Brand
Aesthetics matter. A button that clashes with your site's design looks unprofessional. The styling options were adequate for most use cases.
-
Button Position: You could choose bottom-right, bottom-left, top-right, or top-left. Bottom-right is the standard and most intuitive placement for a FAB, as it avoids interfering with top navigation and is easily reachable with the right thumb on mobile.
-
Icon Selection: The plugin came with a small library of pre-loaded phone icons (e.g., a classic receiver, a modern smartphone outline). The selection was decent, but I was disappointed by the lack of an option to upload a custom SVG icon. This is a feature developers often want for perfect brand alignment.
-
Color Pickers: Standard color pickers were available for the button background and the icon color. This is sufficient for matching any brand's color palette. There were no options for hover states, but the default effect was a subtle darkening, which is acceptable.
-
Size and Padding: Sliders or input fields to control the size of the button and its distance from the edges of the screen. This is crucial for avoiding overlap with other elements like cookie consent banners or chat widgets. I found the default settings to be well-chosen, but the ability to tweak them is essential.
Display Logic: The Smart Rules
This is the area that separates a basic tool from a professional one. Controlling where and when the button appears is key to good UX.
-
Device Visibility: This was the most important setting for me. The plugin offered three choices: Show on All Devices, Show on Mobile Only, or Show on Desktop Only. "Mobile Only" is the most practical option for 90% of websites. Displaying it on desktop can be useful if your target audience heavily uses VOIP software, but for most local businesses, it's unnecessary screen clutter.
-
Page/Post Targeting: The plugin included a robust set of rules for including or excluding the button on specific parts of the site. You could show it everywhere except the homepage, or only on pages with
/services/in the URL. You could also target specific post IDs. This is incredibly useful. For instance, an e-commerce site might only show the call button on high-value product pages where customers are likely to have questions. A blog might hide it on articles to provide a distraction-free reading experience but show it on the "Contact Us" and "About Us" pages. -
Business Hours (Missing Feature): A significant missed opportunity was the lack of a scheduler. Many businesses only want to receive calls during specific hours. A truly high-value plugin would allow the admin to set business hours (e.g., 9 AM to 5 PM, Monday-Friday) and automatically hide the button outside of that schedule. Without this, you risk frustrating users who call an empty office and potentially creating a negative brand impression. This is a feature I would strongly look for in a competing product.
Shortcode Implementation
In addition to the floating button, the plugin provided a shortcode, [click_to_dial], which allows you to place a static, inline call button anywhere in your content. This is useful for embedding a call-to-action directly within a blog post, on a pricing table, or in a page's footer.
The shortcode supported attributes to override the global settings:
[click_to_dial number="+15559876543" text="Call Sales Team"]
This flexibility is excellent. It means you can have a general support number in the floating button but place a button for a specific sales department directly on a product page. The shortcode rendered a clean, simple button that inherited styles from my theme, which is the correct behavior. It didn't inject a bunch of opinionated, hard-to-override CSS for the inline version.
Under the Hood: A Developer's Critical Perspective
A slick UI is nice, but as a developer, I'm always concerned with what's happening behind the scenes. Performance, code quality, and security are non-negotiable.
Performance Impact
A single-function plugin should be feather-light. I ran a few tests using my browser's developer tools to inspect the assets it loaded and its impact on page performance.
-
Asset Loading: The plugin adds one small CSS file and one JavaScript file to the front end. On my test, the combined size was under 15kb (gzipped), which is excellent. These assets were also conditionally loaded, meaning they only appeared on pages where the button was active. This is a sign of good development practice; many lesser plugins load their assets on every single page, regardless of whether they are needed.
-
HTTP Requests: It adds two extra requests. For a modern site using HTTP/2, this is trivial, but it's still something to be aware of. The impact on load time was negligible, well under 50ms on a decent connection.
-
Core Web Vitals: The floating button is injected into the DOM via JavaScript after the page loads. Because it has a fixed position and appears late in the rendering process, it had no negative impact on Largest Contentful Paint (LCP). Crucially, it also did not cause any Cumulative Layout Shift (CLS), as it doesn't push any other content around. It exists in its own layer on top of the page. This is a huge plus, as layout shift is a common problem with poorly coded pop-ups and banners.
Overall, the performance footprint is minimal. It's a well-behaved plugin that won't slow your site down.
Code Quality and Extensibility
While I can't review every line of code without the source, I can make some educated observations. The plugin appears to use standard WordPress hooks and filters. The settings page uses the WordPress Settings API properly, which is good for security and compatibility. The HTML output was clean and semantic.
For extensibility, I would have liked to see some developer-facing hooks. For example, a filter like click_to_dial_button_html would allow a developer to completely change the button's HTML output if needed, or an action like before_click_to_dial_render could be used to enqueue additional scripts. The lack of such hooks means customization beyond the settings panel requires either CSS overrides or, in a worst-case scenario, forking the plugin.
The GPL and Value Proposition
Plugins like this often exist in a competitive space. You can find free versions with fewer features, and you can find expensive all-in-one solutions. The value of a premium, single-purpose plugin from a marketplace like gplpal is that you get access to well-supported, focused tools under the GPL license without a hefty price tag or ongoing subscription. This model is particularly beneficial for developers and agencies building multiple sites. You can get the job done with a reliable tool, and while you're there, you might even find other assets like Free download WordPress themes to complete your project, streamlining your workflow and budget.
The Final Verdict: Is It Worth Your Time?
So, should you use the "Click to dial" plugin? The answer depends on your needs.
Who is it for?
-
Small to Medium Businesses: For any business where phone calls are a primary source of leads (plumbers, lawyers, restaurants, consultants), this plugin is a fantastic, low-effort way to increase engagement. The ease of setup and styling makes it accessible to non-technical users.
-
Freelancers and Agencies: As a developer, this is a great tool to have in your toolbox. It's a quick and reliable way to add a requested feature to a client site without spending hours on custom development or fighting with a bloated, multi-purpose plugin.
-
Sites Needing Conditional Logic: If you need to show a call button only on mobile, or only on specific pages, this plugin's display rules are a key selling point over a simple manual implementation.
Who should pass?
-
Enterprise-Level Users: Large corporations with dedicated sales teams will likely need a more robust solution that integrates with their CRM and provides in-depth call tracking and analytics (e.g., dynamic number insertion for campaign tracking). This plugin is too simple for that level of requirement.
-
Developers Who Need Maximum Customization: If you need to integrate complex functionality, custom icons, or business-hour logic, you might be better off either coding a solution from scratch or looking for a more advanced, developer-focused alternative that offers more hooks and filters.
-
Minimalists on a Budget: If all you need is a simple
tel:link in your footer and you don't care about a floating button or display rules, then a plugin is overkill. The Gutenberg editor's button block or a simple HTML widget will suffice.
Ultimately, the "Click to dial - Direct call from website WordPress plugin" does exactly what it says on the tin, and it does it well. It's lightweight, easy to configure, and provides the essential features needed to effectively add a call-to-action button to a WordPress site. While it lacks some advanced features like business-hour scheduling and full developer extensibility, its strengths lie in its simplicity and performance. It solves a specific problem without creating new ones, which is the hallmark of a good utility plugin.
Final Scorecard
-
Ease of Use: 5/5 - The setup is intuitive and takes less than five minutes. The admin panel is clean and self-explanatory.
-
Features: 3.5/5 - It has all the essential features like styling and device/page display rules. However, the lack of a business hours scheduler and custom icon uploads holds it back from a perfect score.
-
Performance: 4.5/5 - Very lightweight with a minimal front-end footprint. It won't hurt your site's performance or Core Web Vitals.
-
Value: 4/5 - For its price point, it provides significant value, especially for agencies and small businesses who will see a direct return in the form of more customer calls.
评论 0