Bliize Template Deep Dive: A Technical Review and No-Nonsense Guide - Activated
Bliize Template Deep Dive: A Technical Review and No-Nonsense Guide
Building a digital presence for an architecture or construction firm is a unique challenge. The website can't just be a digital brochure; it needs to be a portfolio, a statement of design philosophy, and a client acquisition tool all at once. It must project strength, precision, and aesthetic competence. This is where a specialized template can either be a massive accelerator or a technical bottleneck. Today, we’re tearing down the Bliize - Architecture Construction Template to see if its foundation is as solid as the structures it’s meant to represent. We'll go beyond the live demo, dissecting its code, performance potential, and real-world customizability before walking you through a practical installation and setup process.
Part 1: The Technical Review - Is Bliize Built to Last?
A template's sales page always shows the best-case scenario. The real test is cracking open the ZIP file and inspecting the source. As developers, we need to know what we're getting into. Is this a clean slate ready for our vision, or a tangled mess of code that will fight us every step of the way? Let's find out.
First Impressions: Design, UI, and Aesthetic Language
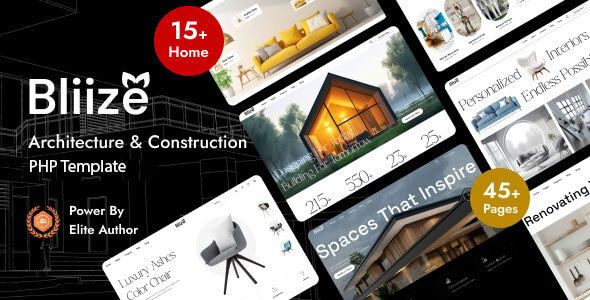
Out of the box, Bliize presents a clean, modern, and professional aesthetic that is undeniably appropriate for its target niche. The design language leans heavily on strong typography, generous whitespace, and a monochromatic color palette accented with a single, bold color (a rusty orange in the default demo). This is a smart choice. It allows the user's project imagery—the architectural photography and construction site photos—to be the hero of the page. The layout feels confident and uncluttered, avoiding the unnecessary animations and parallax effects that can often make corporate sites feel cheap.
The template comes with a handful of pre-built pages that cover the essentials: Home, About, Services, Projects, Blog, and Contact. The homepage variations are well-conceived, offering different hero section styles, including static images, sliders, and video backgrounds. This provides a decent level of flexibility from the get-go. The project detail pages are particularly well-executed, providing a clean canvas to showcase case studies with a mix of images, text, and project metadata (client, location, date). The typography choices—a pairing of a sharp sans-serif for headings and a highly legible body font—reinforce the professional tone. There's a clear visual hierarchy that guides the user's eye through the content logically. It looks good, but the real question is how it's built.
Under the Hood: Code Quality and Architectural Integrity
This is where a template truly proves its worth. A beautiful facade can hide a rotten structure. Upon unzipping the Bliize package, you're greeted with a straightforward folder structure: assets (containing css, js, images, fonts), and the root HTML files. There's no complex build environment included—no package.json, no Webpack or Gulp configuration. This is both a pro and a con. For a junior developer or someone wanting to get a static site up quickly without fussing with Node.js, this is perfect. For a senior developer or an agency looking to integrate this into a modern development workflow, it means you'll be setting up your own build process from scratch.
HTML Structure
I was pleasantly surprised opening up index.html. The markup is clean and largely semantic. You'll find proper use of ,, ,, and ` tags, which is a solid win for both accessibility and SEO. Headings follow a logical hierarchy, though a quick spot-check revealed a few pages whereh2andh3` tags could have been structured more effectively for content outline. The code is well-commented, with clear sections marking the start and end of major components like "Header Area," "Hero Slider," or "Services Section." This makes navigating the files and identifying blocks for customization significantly easier than in many other premium templates.
CSS & Styling
The styling is handled through a main style.css file, along with several other stylesheets for specific plugins (like Swiper for sliders or Magnific Popup for lightboxes). The primary CSS file is well-organized and readable, but it is a single, monolithic file. It's not built with a preprocessor like Sass or Less, so you won't find variables for easy color scheme changes out of the box. To change the primary accent color, you'll need to do a find-and-replace for the specific hex code (e.g., #E45624). This is a slight drawback for rapid rebranding. A developer could, of course, refactor this using CSS Custom Properties in about 20 minutes, which I would highly recommend as a first step.
The layout is built primarily on Bootstrap's grid system, which is a familiar and reliable choice. This makes the template inherently responsive and easy to manipulate for anyone with Bootstrap experience. The custom styles layered on top are logical, and the class naming convention loosely follows a BEM-like (Block, Element, Modifier) pattern, which helps prevent style conflicts when you start adding your own components.
JavaScript & Interactivity
Bliize relies on jQuery. While many in the developer community are moving away from it in favor of vanilla JavaScript or modern frameworks, its inclusion here is pragmatic. It powers many of the included plugins and simplifies DOM manipulation for common tasks. For a static template of this nature, it's not a deal-breaker, but it's something to be aware of. If your team has a "no jQuery" policy, this template will require significant refactoring.
The interactive elements are powered by a suite of reliable, third-party libraries:
-
Swiper.js: For all the carousels and sliders. This is an excellent, modern, and performant choice.
-
Magnific Popup: A classic and dependable lightbox solution for image galleries.
-
Isotope: For the filterable portfolio grid. It’s a powerful library that works very well for this use case.
The custom logic is contained within a main.js file. The code is procedural and easy enough to follow. It handles things like initializing the plugins, the mobile navigation toggle, and the "back to top" button. It's not a marvel of modern JavaScript architecture, but it's functional, commented, and gets the job done without being overly complex.
Performance, SEO, and Mobile Experience
A beautiful site is useless if it's slow and invisible to search engines. The Bliize template provides a solid foundation, but you'll need to do some optimization work to make it fly.
Performance: Running the demo through a performance analyzer reveals decent, but not perfect, scores. The primary bottleneck, as with most templates, is unoptimized images and the loading of multiple CSS and JS files. The provided image assets are high-resolution JPEGs, which look great but need to be compressed and ideally converted to a modern format like WebP. The template does not include lazy loading for images by default, a critical feature for image-heavy portfolio sites that you will absolutely need to implement yourself. The CSS and JS files are not minified in the source, so a build step to concatenate and minify these assets is essential for a production environment.
SEO: The semantic HTML and logical heading structure are a great start for on-page SEO. However, the template uses generic meta titles and descriptions that must be customized for every single page. It’s a basic requirement, but one that’s easily forgotten. The lack of a blog powered by a CMS means you'll be creating new HTML files for each post, which is not ideal for a serious content marketing strategy. For that, you might consider converting this template to a WordPress theme, a task that platforms like gpldock cater to by providing a vast library of tools and plugins. Many users often start with an HTML template to define the look and feel before moving to a more robust platform, where they can find a wide array of Free download WordPress themes that might offer more integrated functionality.
Mobile Experience: The Bootstrap foundation ensures that the site is fully responsive. It reflows elegantly on tablets and smartphones. The mobile navigation is a standard "hamburger" menu that slides in from the side, which is a user-friendly and expected pattern. Clickable elements like buttons and links have adequate spacing, preventing "fat finger" issues. The mobile experience is solid right out of the box.
Part 2: The Installation and Customization Guide
Now, let's move from theory to practice. Here’s a no-nonsense guide to getting Bliize downloaded, customized with your own brand and content, and ready for deployment.
Prerequisites and Initial Setup
You don't need a high-end development machine to work with this template. Here's the bare minimum:
-
A Code Editor: Visual Studio Code is the free, industry-standard choice. It has excellent extensions that will make your life easier.
-
A Web Browser: Obvious, but necessary for previewing your changes.
-
Basic HTML & CSS Knowledge: You need to be comfortable editing HTML tags and changing CSS values.
Once you've downloaded and unzipped the Bliize package, open the entire folder in your code editor. You'll see the file structure we discussed earlier. The key to an efficient workflow is to use a live-reloading development server so you can see your changes instantly without manually refreshing the browser. The "Live Server" extension for VS Code is perfect for this. Simply install it, right-click on your index.html file, and select "Open with Live Server."
Step-by-Step Customization
Step 1: The Global Elements (Logo and Footer)
Your logo and footer information appear on every page, so let's start there. Because this is a static HTML template, you will have to repeat these changes on every HTML file (index.html, about.html, contact.html, etc.). This is the primary drawback of static sites. A find-and-replace across all files can speed this up.
Changing the Logo:
Open index.html. Near the top, inside the ` element, you will find the logo's HTML. It will look something like this:
<a class="navbar-brand" href="index.html"><img src="assets/images/logo.png" alt="Bliize Logo"></a>
Replaceassets/images/logo.pngwith the path to your own logo file. Make sure to update thealttext to your company's name. It's best to place your logo image in the sameassets/images/` folder.
Updating Navigation Links:
In the same ` section, you'll find an unordered list (
) with the classnavbar-nav. Each list item (
- ) contains a link (``). Edit thehref` attribute to point to the correct page and change the text between the tags to your desired link name (e.g., change "Projects" to "Our Work").
Updating the Footer:
Scroll to the bottom of any HTML file to find the section. Here you can update the copyright text, contact details, and social media links. The social links are typically in an unordered list, where you'll need to change the `href` attribute of each tag to your own profile URL.
Step 2: Customizing the Homepage Content
Let's edit the main content on index.html.
The Hero Section: The first section after the header is usually the hero slider or static image. Find the section with a class like hero-slider. Inside, each slide will be a div. You can change the background image by editing the inline style or the associated CSS. The heading (`) and paragraph (
`) text can be edited directly.
Services/Features: Look for a section with comments like . Inside, you'll find repeating blocks of HTML, often a `div` with a class like `col-lg-4`. Each block represents one service. Change the icon (the class name on the tag, likely from FontAwesome or a similar library), the heading, and the description text for each of your services.
Step 3: Populating the Portfolio (Projects Page)
This is the most important page for your business. Open projects.html.
The page likely uses Isotope for filtering. At the top of the content area, you'll find the filter buttons. You can rename these categories. Make sure the data-filter attribute on the button (e.g., data-filter=".architecture") matches the class name on the project items you want to show (e.g., class="... architecture").
Each portfolio item is a block of HTML. It will contain:
-
An `` tag for the project thumbnail.
-
A link
` wrapping the image, pointing to the project detail page (e.g.,project-single.html`). -
A heading and a short description for the project title and category.
You'll need to duplicate this block for each project you want to add. Then, you'll need to create a corresponding detail page for each one. The easiest way is to duplicate project-single.html, rename it (e.g., project-office-build.html), and then edit its content with the specific project's images, text, and details.
Step 4: Making the Contact Form Functional
This is a critical step that trips up many beginners. An HTML template cannot process a form on its own. It can only collect the data. You need a backend service to receive the form submission and email it to you.
The form is in contact.html. You'll see a ` tag. You need to modify theactionattribute and potentially themethod` attribute.
Your Options:
-
PHP Script (Traditional): If your web hosting supports PHP, you can point the form's
actionto a PHP script (e.g.,action="send-email.php"). You would need to write a simple script that takes the POST data from the form and uses PHP'smail()function to send it. This requires some backend knowledge. -
Third-Party Services (Easiest): Services like Formspree, Netlify Forms, or FormKeep are designed for this exact purpose. For Formspree, you simply sign up, create a new form endpoint URL, and set it as your form's
actionattribute. It’s incredibly easy and often has a generous free tier. This is the recommended route for anyone who isn't a backend developer.
Deployment to a Live Server
Once your customization is complete, it's time to go live.
-
Get Hosting & a Domain: You need a domain name (e.g.,
mycompany.com) and a basic web hosting plan from any reputable provider. -
Upload Files: The most common method is using an FTP (File Transfer Protocol) client like FileZilla. Your host will provide you with the server address, username, and password. Connect to your server and upload all the files and folders from your local project folder into the
public_htmlorwwwdirectory on your server.
After the upload is complete, your website should be live at your domain name. Make sure to test all pages and links to ensure everything works as expected.
The Final Verdict
So, what's the bottom line on the Bliize - Architecture Construction Template? It's a tale of two sides.
The Good:
-
Excellent Aesthetics: The design is professional, modern, and perfectly suited for the architecture and construction industry.
-
Clean & Semantic HTML: The foundation is solid, which is great for SEO, accessibility, and ease of customization.
-
Good Component Selection: The use of reliable libraries like Swiper and Isotope provides great functionality out of the box.
-
Beginner-Friendly: The lack of a complex build setup makes it very approachable for those new to web development or for rapid prototyping.
The Areas for Improvement:
-
No CSS Preprocessing: The lack of Sass/Less variables makes global style changes (like the main brand color) more tedious than they need to be.
-
Requires Manual Optimization: You will need to implement image compression, lazy loading, and asset minification yourself to achieve top-tier performance.
-
jQuery Dependency: This may be a non-starter for development teams with a modern, vanilla-JS-first workflow.
-
Static Site Limitations: Managing content, especially a blog or a large portfolio, will become cumbersome over time without converting it to a CMS.
Bliize is an excellent choice for freelance developers or small agencies tasked with building a sharp, professional-looking portfolio site for a client on a reasonable budget and timeline. It provides a high-quality visual and structural starting point that can be deployed quickly. However, for larger-scale projects or for teams that rely on modern front-end build tools and frameworks, it should be seen as a strong design asset to be integrated into a more robust workflow, not as a final, production-ready solution. It delivers on its promise, provided you understand exactly what you're getting: a beautifully designed set of static files ready for your content and your technical expertise.
评论 0