BOTS Figma Template Review: A Developer's Guide to Building an AI Agency Website - NULLED
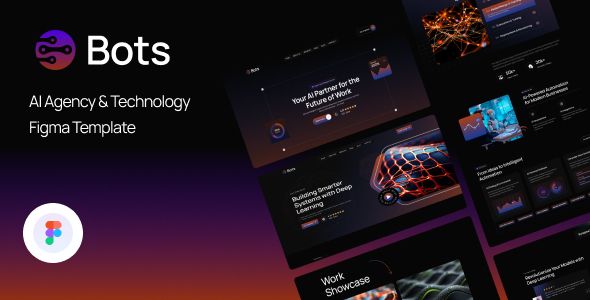
BOTS Figma Template Review: A Developer's Guide to Building an AI Agency Website
The explosive growth in AI has created a parallel gold rush for agencies and startups needing to market their services with credibility and technological flair. A slick, modern website is no longer optional; it's table stakes. This is where pre-made design systems come in, promising a fast track from idea to a high-fidelity mockup. Today, we're putting one such product under the microscope: the BOTS - AI Agency & Technology Figma Template. This isn't just a design review. As a developer, I’m tearing this file apart to answer the most critical question: can you actually build a real-world, performant, and maintainable website from this? Or is it just another pretty picture that will cause headaches during the handoff process?
Part 1: The Initial Autopsy – File Structure and Hygiene
Before you can appreciate the aesthetics, you have to assess the foundation. A poorly organized Figma file is a developer's nightmare, translating directly into wasted hours and inconsistent code. The experience of opening a new design file for the first time tells you a lot about the designer's discipline and their consideration for the development team.
Unboxing and First Impressions
Upon importing the BOTS.fig file, the first thing I noticed was its reasonable size. It’s not overly bloated with uncompressed images or unnecessary pages, which is a good sign. The file loads quickly in the Figma desktop app. It opens to a clean cover page, which is a professional touch I always look for. This cover provides a brief overview, a link to the assets, and a "Thank You" note. It’s a small detail, but it sets a positive tone and acts as a proper entry point, rather than just dumping you onto a random artboard.
The file is structured with a handful of top-level pages:
-
Cover: The aforementioned welcome screen.
-
UI Styleguide: The heart of the design system. This is where colors, typography, components, and other core assets should live.
-
Homepage 01, Homepage 02, etc.: Multiple variations of the main landing page.
-
Inner Pages: A collection of pre-designed pages like "About Us," "Services," "Blog," and "Contact."
This page-level organization is logical and standard practice. It separates the foundational design system from the concrete page layouts, which is crucial for maintainability. You know exactly where to go to find either the building blocks or the assembled structures.
Layer Naming: The Litmus Test for Developer Friendliness
Now for the real test. I dove into the layers of the main homepage. A well-named layer structure is the difference between a smooth component build and a frustrating game of "guess the element." A layer named Hero Section is immediately understandable; Frame 14872 is not.
To my pleasant surprise, the BOTS template scores relatively well here, though with room for improvement. Major sections are grouped and named semantically: Header, Hero, Partners, Service, CTA, Footer. This is excellent. It allows a developer to quickly scaffold the page structure in HTML or a component-based framework like React or Vue.
Digging deeper, however, reveals some inconsistencies. While major containers are well-named, some of the inner elements resort to default Figma naming. For instance, inside a Card component, you might find Rectangle 45 and Text 98. This isn’t a deal-breaker, but it’s a missed opportunity. For a truly seamless handoff, these should be named card-background or card-title. Modern dev tools can even use these names to auto-generate class names or variable names, so semantic naming down to the individual element level is a hallmark of a top-tier template.
Auto Layout: The Key to True Responsiveness
Auto Layout is Figma's answer to CSS Flexbox. Its proper use is non-negotiable for any modern UI kit. It dictates how elements respond when content changes, which is the very essence of a dynamic website. A button's padding should remain consistent whether its label is "Go" or "Get Started Now," and Auto Layout is what makes this possible within the design file.
The BOTS template uses Auto Layout extensively, and for the most part, correctly. I tested this by modifying button text, adding items to lists, and typing longer paragraphs into text boxes. In most cases, the layout reflowed as expected. Spacing between elements is managed by Auto Layout properties, not by manual positioning, which is exactly what you want to see. This means the 8px spacing grid is baked into the components themselves.
However, I did find some areas where Auto Layout could have been used more robustly. Some of the more complex card layouts with overlapping decorative elements occasionally rely on absolute positioning. While this achieves the desired visual effect in a static design, it's a red flag for developers. Recreating this exact layout in CSS can be tricky and brittle, often requiring a combination of relative and absolute positioning that can break easily on different screen sizes. A more refined approach would have been to build the entire card structure with a single Auto Layout frame, using negative margins or other techniques to achieve the overlap. This is an advanced technique, and its absence here suggests the template prioritizes visual flair over ease of implementation in a few key areas.
Part 2: Deconstructing the Design System
A template is only as good as its design system. This is the collection of reusable styles and components that ensure consistency and speed up both design and development. The "UI Styleguide" page is where we'll spend most of our time.
Color and Typography Styles
The foundation of any design system is its global styles for color and typography. Changing a brand's primary color should be a single edit, not a hunt through hundreds of layers.
BOTS gets this right. The color palette is defined in the "Local Styles" panel and applied correctly throughout the file. The colors are named with a simple, hierarchical structure: Primary/Blue, Secondary/Green, Greyscale/900, Greyscale/800, and so on. This is a good, practical naming convention. A developer can easily map these to CSS custom properties or a Tailwind CSS theme configuration:
--color-primary: #3A57E8;--color-grey-900: #1C1C1C;
The typography system is similarly well-structured. It defines a clear set of text styles like H1, H2, Body/Large/Bold, Body/Small/Regular. This creates a strong visual hierarchy. When you click on any text element in the page designs, you see it's correctly linked to one of these global styles. This means if the client decides to switch the body font from "Inter" to "Poppins," it’s a two-click change that propagates everywhere. This is exactly how a professional design file should function.
The Component Library: Atoms, Molecules, and Organisms
Components are the reusable building blocks of the UI. The quality of a template’s component library directly impacts development velocity.
BOTS's components are generally well-built. They are all consolidated on the UI Styleguide page, which is great for discoverability. Let's break down the key elements:
-
Buttons: The button component is a good example of effective variant usage. It includes variants for Style (Primary, Secondary, Tertiary), State (Default, Hover), and whether it has an Icon or not. This is solid. However, it’s missing a disabled state and a size property (e.g., small, medium, large). A developer would need to infer or create these states and sizes themselves, which is a minor but notable omission.
-
Forms: Input fields, text areas, and dropdowns are provided. They are built with Auto Layout, so they resize correctly. They also include variants for different states like Default, Filled, and Error. This is crucial for building functional forms and provides clear guidance for front-end validation styling.
-
Cards: There are numerous card styles for services, testimonials, blog posts, and team members. This is where the bulk of the template's visual identity lies. They are constructed as components, which is good for reuse. However, as mentioned earlier, some of the more complex designs are a bit rigid. The properties you can override are limited to text and images. If you wanted to, for example, remove the "tag" from a blog post card, you'd have to dive into the component's layers to hide it rather than toggling a boolean property on the instance. A more mature component would expose these elements as variant properties.
-
Iconography: The template uses a custom set of solid-style icons, which are all turned into individual components. This is the correct approach. It allows a designer or developer to swap an icon instance via the Figma sidebar easily. The icons themselves are clean and fit the tech aesthetic well.
Overall, the component library is strong but not perfect. It follows the core principles of component-driven design, but it lacks the depth of variant properties you might find in a world-class design system like Material Design or Ant Design. For a small to medium-sized agency site, it's more than sufficient, but for a large-scale product, developers would need to invest time in making the components more robust and configurable.
Part 3: The Developer Handoff – Translating Design to Code
This is where the rubber meets the road. A beautiful design is useless if it's a nightmare to code. I evaluate a template's "buildability" on several factors.
Grid and Spacing System
Consistency is key to clean CSS. A predictable grid and a consistent spacing scale are a developer's best friends. BOTS is built on a 12-column grid, which is immediately familiar to anyone who has used frameworks like Bootstrap or Foundation. The main container width is specified (e.g., 1290px), and layouts adhere to this grid. This makes writing the high-level layout CSS straightforward.
More importantly, the template seems to adhere to an 8-point spacing system. This means margins, paddings, and the space between elements are typically multiples of 8px (8, 16, 24, 32, etc.). This is a best practice that translates directly into a clean spacing scale in your CSS or Tailwind config. Using Figma's inspection tools, I can see these consistent values being applied via Auto Layout, which gives me confidence that I can build a utility-class-based system or a set of simple CSS variables to replicate the design with high fidelity.
Potential Implementation Challenges
While mostly straightforward, there are a few design elements in the BOTS template that could pose a challenge during development:
-
The Glowing Gradient Blobs: A signature part of the template's aesthetic is the use of large, soft, glowing gradient shapes in the background. In Figma, these are just vector shapes with blurs. In code, achieving this effect performantly can be tricky. Using large, blurred CSS gradients or SVGs can be resource-intensive and might impact your site's performance, especially on lower-powered devices. Developers will need to experiment with the best technique, perhaps using highly compressed WebP images or carefully optimized CSS, to avoid slowing down the page load.
-
Overlapping Elements: As noted before, some cards and hero sections feature elements that overlap. While visually appealing, this requires careful use of CSS positioning (position: absolute) and z-index. This can make responsive adjustments more complex. For example, an element that overlaps nicely on a desktop might collide awkwardly on a tablet screen, requiring specific media queries to adjust its position.
-
Animations: The template is static, so any animations (like hover effects on cards, on-scroll reveals, etc.) are left to the developer's imagination. The design implies certain interactions (e.g., a card lifting on hover), but the specifics aren't defined. This isn't a flaw of the template itself, but something teams need to plan for. The developer will need to work with the designer to define the animation curves and properties to bring the site to life.
Part 4: Installation and Customization Guide
"Installation" for a Figma template simply means getting it into your workspace and understanding how to tailor it to your needs. This process is straightforward, but following a few key steps will save you time and prevent you from accidentally breaking the original system.
Step 1: Getting the Template
First, you need the .fig file. There are various marketplaces for this, but for those on a budget or looking for value, services like gpldock offer access to a vast library of assets under GPL licensing. This model provides an affordable way to access premium tools, which is especially useful for freelancers and small agencies. Once you've downloaded the file, you'll have a .zip archive containing the BOTS.fig file.
Step 2: Importing into Figma
With the .fig file ready, log into your Figma account (the process is the same for the web or desktop app):
-
On your main dashboard/file browser, look for the "Import file" button, usually located in the top-right corner.
-
Click it and select the BOTS.fig file from your computer.
-
Figma will process the file and add it to your "Drafts."
Crucial Pro-Tip: Do not start working on this imported file directly. Always treat it as your master template. Duplicate it immediately (Right-click > Duplicate) and work on the copy. This ensures you always have a clean, original version to refer back to.
Step 3: Customizing the Core Styles
Now that you're in your duplicated file, the first thing you'll want to do is apply your own branding. Thanks to the use of global styles, this is incredibly easy.
-
Changing Colors: With nothing selected, look at the right-hand sidebar. You'll see the "Color Styles." Hover over the color you want to change (e.g., Primary/Blue), click the "Edit style" icon, and simply change the color hex code. This single change will update that color everywhere it's used—on buttons, text, backgrounds, etc.
-
Changing Fonts: The process is identical for typography. In the sidebar, find the "Text Styles." Click the edit icon next to a style like H1. You can change the font family, weight, or size. To change the font across the entire project, you'll need to edit each style (H1, H2, Body, etc.), but it's still far faster than changing individual text boxes.
Step 4: Building Your Pages
With your brand styles applied, you can start assembling your own pages or modifying the existing ones. The "Assets" panel (top-left) will be your primary tool. Here you'll find all the components from the UI Styleguide.
-
Simply drag and drop components like buttons, cards, and navbars onto your artboard.
-
Select a component instance on the page, and use the right-hand sidebar to switch between its variants (e.g., change a button from "Primary" to "Secondary").
-
Override the text and images directly on the instance.
This workflow, which is standard for any good Figma project, is well-supported by the BOTS template. It allows for rapid prototyping and iteration. If you are looking for design assets that can be quickly turned into a website, starting with a well-structured Figma file is half the battle. This is true whether you're building a custom React site or using a page builder in a CMS. Many developers even use Figma templates as a visual guide for customizing existing themes, including the huge variety of Free download WordPress themes available online.
Final Verdict: Is The BOTS Template Worth It?
So, what's the final call on the BOTS - AI Agency & Technology Figma Template? It’s a strong, visually compelling, and well-structured starting point. Its greatest strengths are its modern aesthetic, which perfectly fits the AI/tech niche, and its solid foundation of global styles and a well-organized component library.
For its target audience—agencies, startups, and freelancers needing to create a sharp-looking web presence quickly—it delivers significant value. It dramatically shortens the design phase and provides a clear, actionable blueprint for developers.
From a senior developer's perspective, it's about 85% of the way to a perfect handoff file. The layer naming is good but could be more granular. The components are functional but could be made more robust with more variant properties. And developers should be prepared to tackle the implementation of some of the more ambitious visual effects, like the background glows, with performance in mind. These are not deal-breakers but rather areas for refinement. For the price, especially when sourced from a GPL club, the trade-off is more than fair. It's a template I would be happy to receive from a designer, knowing that while some cleanup and interpretation will be needed, the core structure is sound and ready to be built upon.
评论 0